How to Manage Affiliates with WordPress User Frontend Pro
Affiliate marketing has become popular with internet users as a passive income source. It refers to earning sales commission by promoting others’ products or services through your marketing channels. As it is a win-win situation both for business owners and affiliates, you can introduce affiliate programs to generate more sales.
Managing affiliates is a great challenge for business owners. If you own a WordPress site that allows affiliates, you can use a plugin to manage affiliates without any hassle.
WP User Frontend Pro has everything you need, from creating a registration form to managing the affiliate list on your WordPress website. You can even show the forms or lists based on the user roles, i.e., subscriber, editor, and administrator.
You can easily navigate through the blog following this table of contents-
How Does Affiliate Marketing Work?
The mechanism of affiliate marketing is very straightforward. You need to provide a referral link to the partners. They put that across their blogs, social media platforms, podcasts, websites, and other marketing channels. If any visitor makes a purchase by clicking through the unique links, you’ll generate a sale, and your affiliate will receive a commission.
Commissions are usually paid on a monthly basis. However, the payment schedule may vary based on a particular affiliate program. Affiliate marketers can earn commissions in a variety of ways, including monetary commissions, credit commissions, and discounts.
How to Manage Affiliates with WordPress User Frontend Pro- WPUF
WordPress User Frontend offers login form creation in the free version, but you need to buy the Pro version to create registration forms. Managing affiliate programs require registration form functionality; hence the following guide is applicable only to the paid version of WPUF.
Install & Activate WPUF Pro
Hope you have WordPress installed and your website is up and running smoothly. If you haven’t created a website yet, follow this guideline to create one. Then install and activate both WPUF free and Pro versions to reap its benefits. You can follow the below steps. It’s super simple.
- Go to your WordPress dashboard and select the Plugins menu, click on Add New
- Type WP User Frontend on the plugin search bar
- Choose the first result and click on the Install Now button and activate after installation
- Get the Pro plugin in zip format from your personal dashboard
- Follow this navigation from the admin panel Plugins → Add New → Upload
- Select the zip file from your computer and wait for the upload
- Complete the installation and activate WPUF Pro for your WordPress site
- Upon successful installation, you’ll see a WP User Frontend sidebar on the admin panel.
If you find it hard to complete the setup, the following video can help.
Create Registration Forms
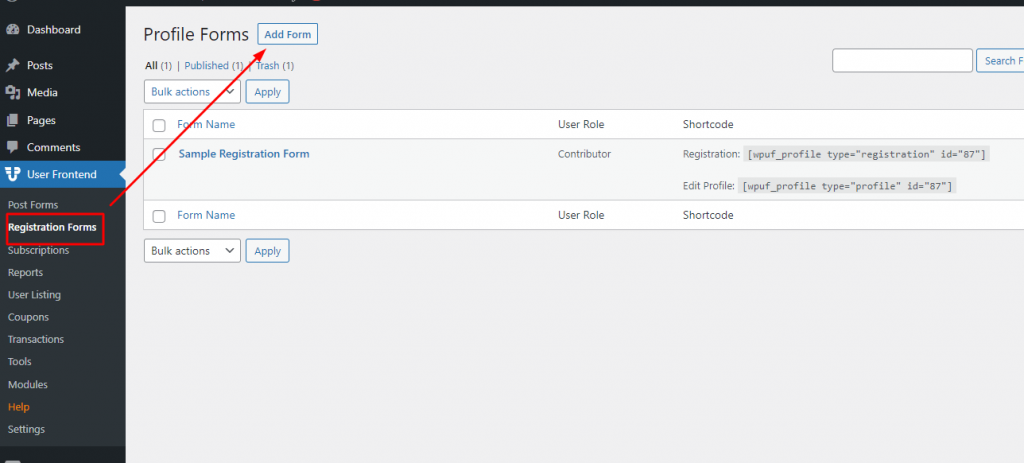
Go to your WordPress dashboard sidebar and choose the User Frontend menu, click on Registration Form. It will take you to a new page with the Add Forms button. Click on that button to create a new registration form.
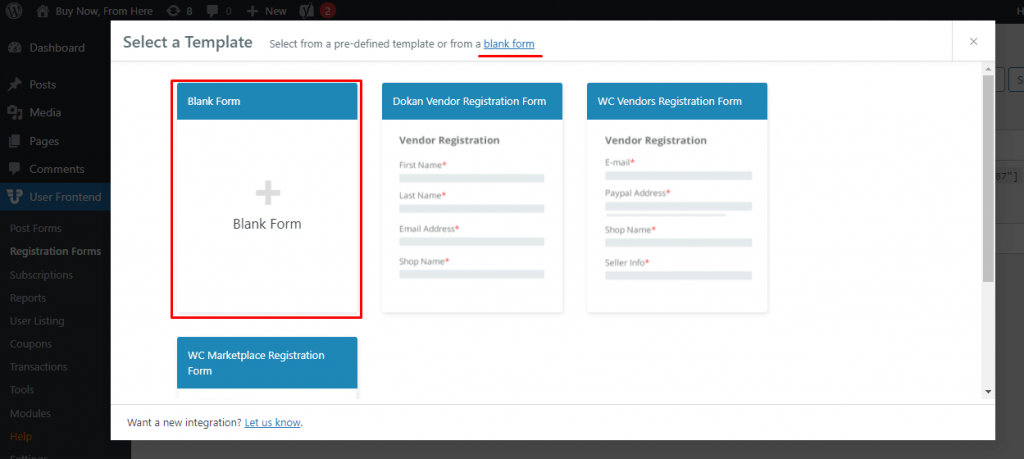
You will see a few readymade templates with an option to use a blank form. Choose the Blank Form to create custom registration forms tailored to your needs.
The blank form has a lot of available fields on the right sidebar. You can drag and drop the fields to the form as per your needs.
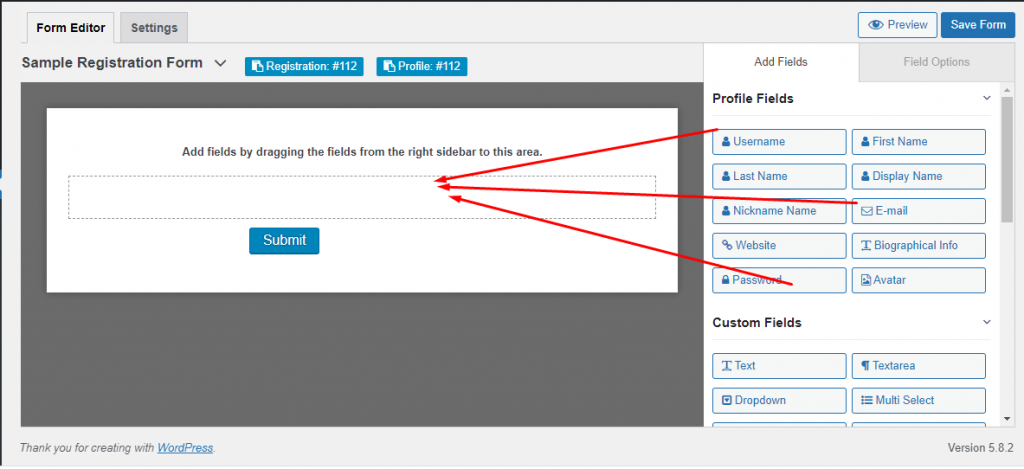
The Pro version of WPUF offers a wide range of custom fields to meet users’ needs. Get a glance at the available options from the below gif.
After adding a few fields of your choice, the registration form will look like the following picture. Each form automatically generates a unique shortcode. You need to copy this code when showing the page on the front end.
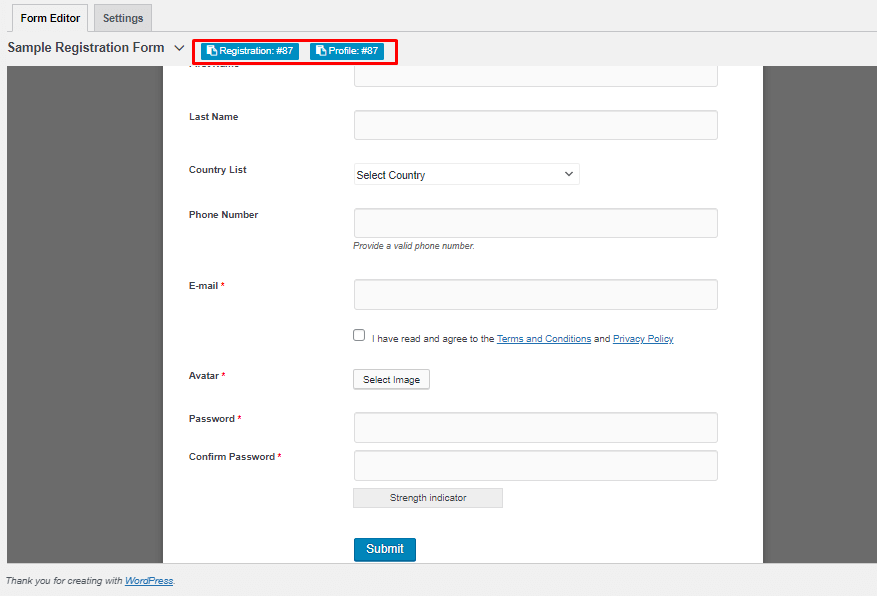
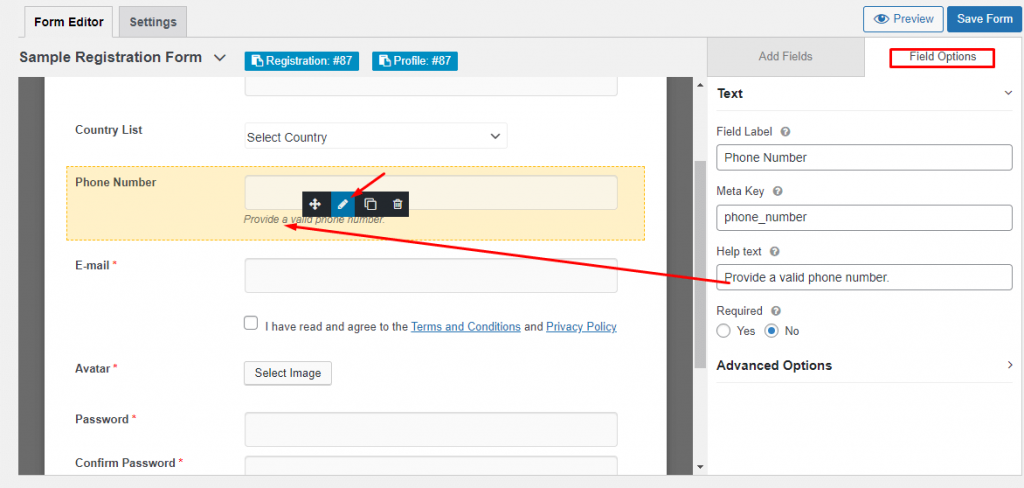
Each input field is editable. You can click on the edit icon or Field Options button to open the editable fields. Add a help text if it’s required for a specific field. You can even make a field required by checking the Yes/No options that appear just above the Advanced Options.
Configure the Settings
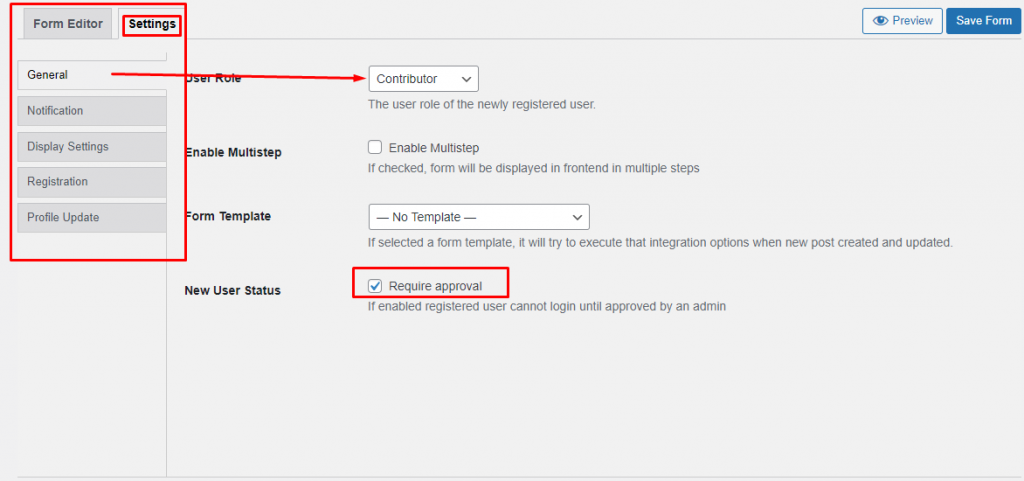
Once the registration fields are done, you need to configure the settings. Check each menu- General, Notification, Display Settings, Registration, and Profile Update. You’ll find everything you need to create an effective affiliate registration form.
Fix the role of the registered from the User Role menu. You can also set New User Status from the General setting options.
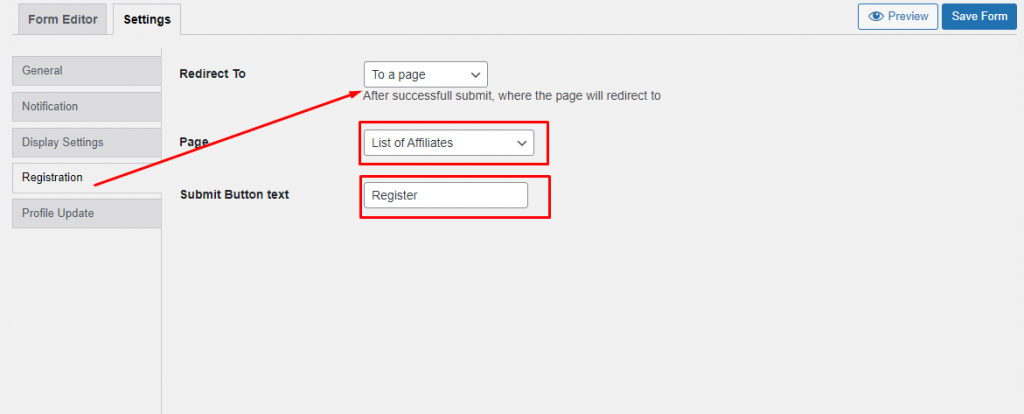
Another important settings menu is the Registration option. Choose a page where you want to redirect users after successfully completing the registration. I created a User List to manage affiliates easily and redirected to that List of Affiliates as shown in the below picture.
I will show you how to create a user directory using WPUF pro in the last section of this blog tutorial.
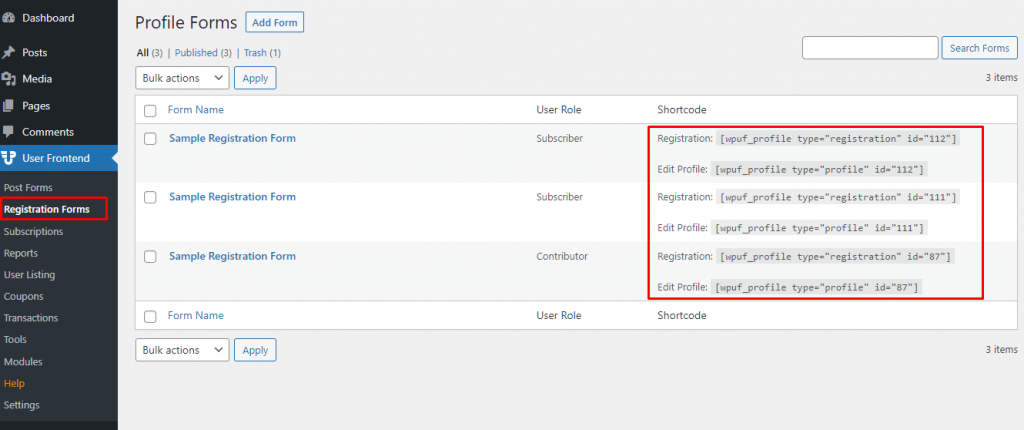
Now click on the Save Form button to save this form under the Registration Forms menu on the User Frontend sidebar. You’ll see the shortcodes required to show these forms on the front end. The codes are available for creating two pages- Registration & Profile pages.
Create Login Forms
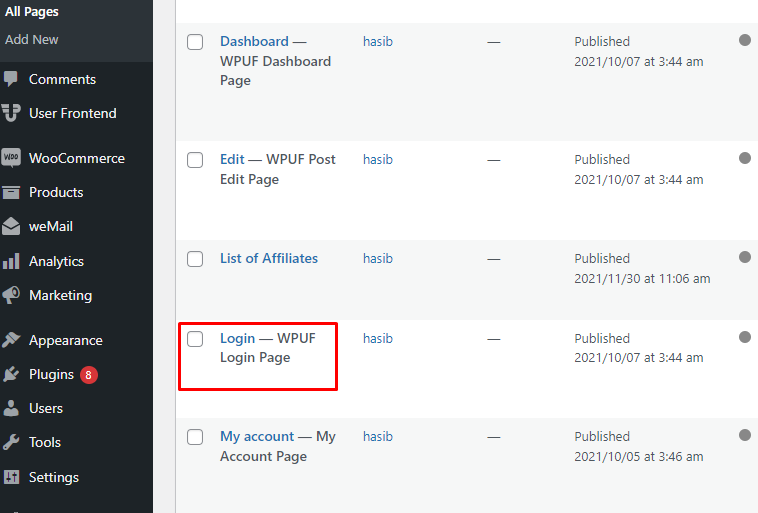
WPUF automatically create a login form for the users. Go to the All Pages menu from the sidebar and you’ll see the Login page there. Set up the login page following this doc.
Now, go to the Settings from the User Frontend sidebar, and integrate the Registration Page with the Login page. Here, you can fix the Target/Landing page for the registered users when they log in.
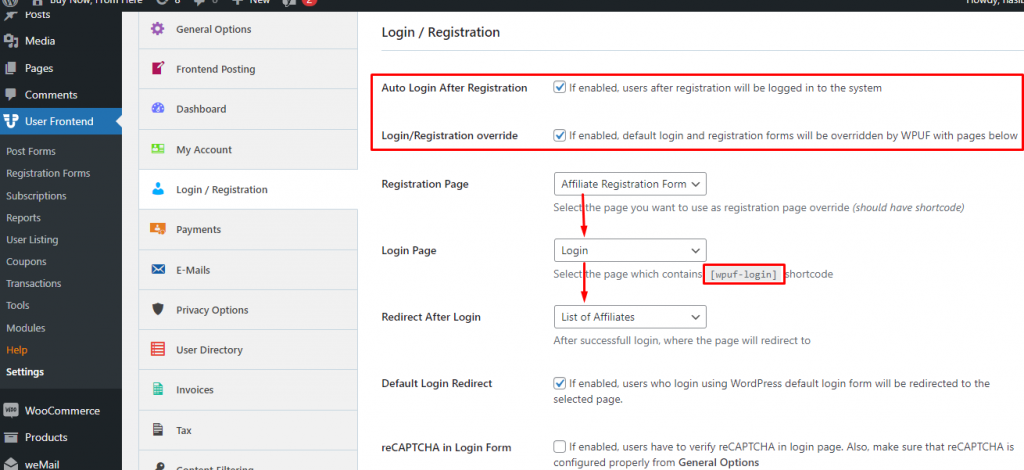
Tick the Auto Login After Registration option to drive registered users directly to the redirected page.
Show the Created Forms
Now you have the login page and the registration page associated with it ready. Let’s show these forms on the front end. As the login page was readymade, here I’m going to show how to show the affiliate registration form that I have just created.
Choose the Pages menu and click on the Add New button.
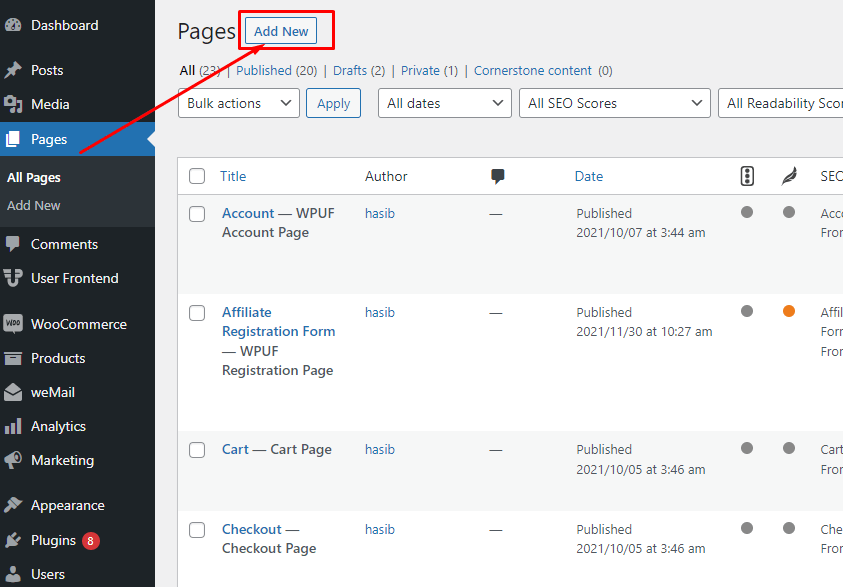
Give a title to your form and paste the shortcode of your registration form on the empty block of the editor.
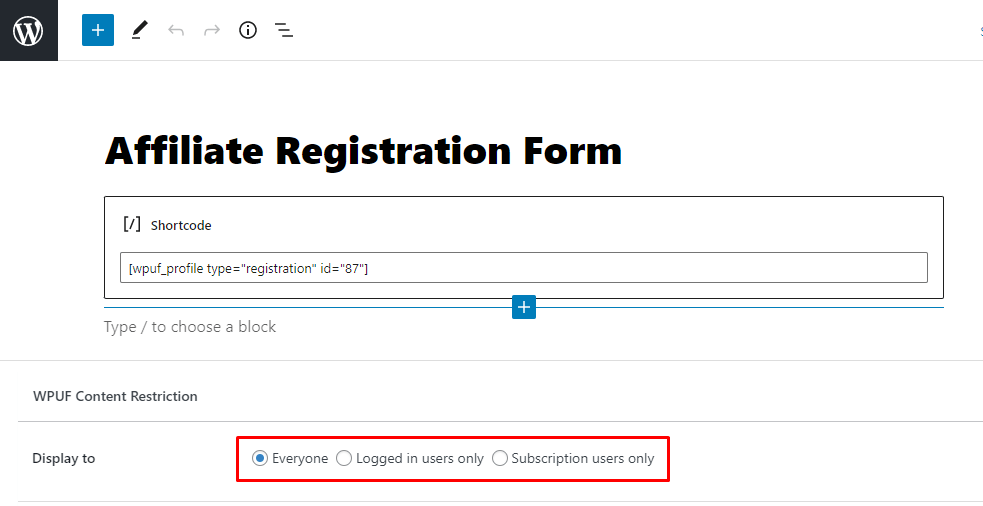
I named the form as Affiliate Registration Form as shown in the next picture. WPF also offers a content restriction feature. You can display this form to Everyone, Logged in users, and Subscription users based on your preference.
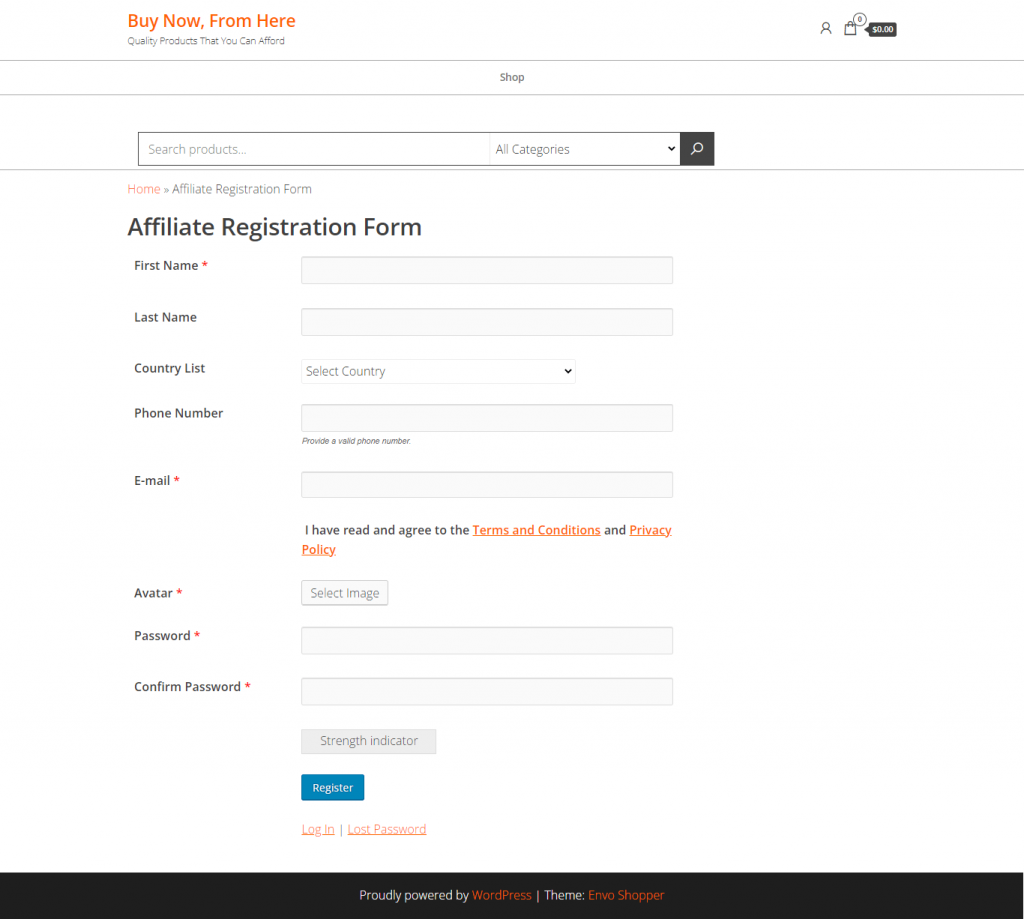
After successfully creating the form, you can see how it looks on the front end. Publish it on the website, or see the preview and adjust necessary changes if needed. My form looks like the following one.
How to Manage Affiliates Using the User Directory Module
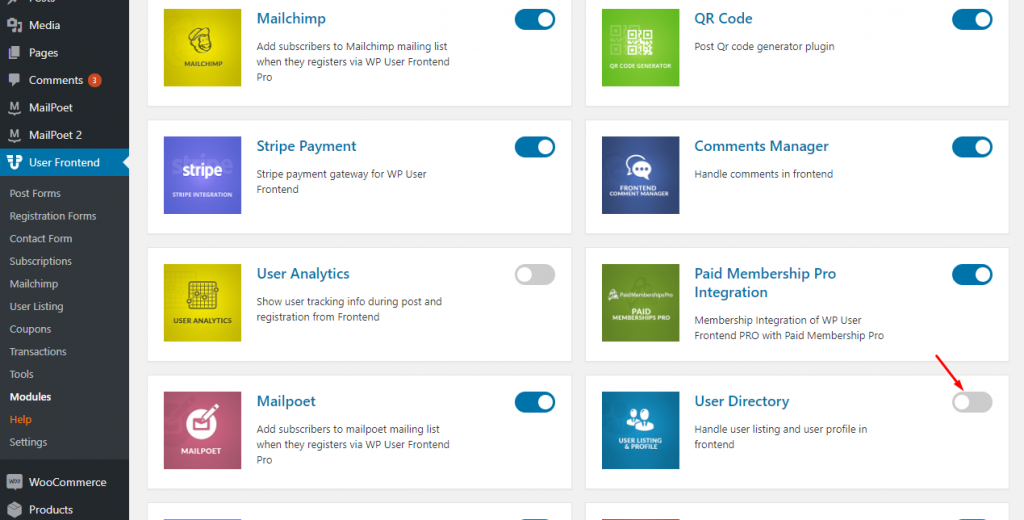
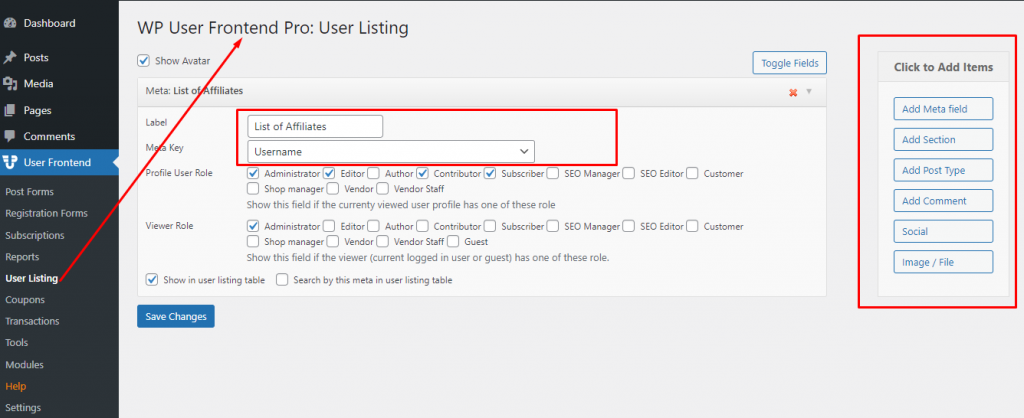
Go to the Module menu from the sidebar, and turn on the User Directory toggle button. You will see a User Listing submenu under the User Frontend menu on the dashboard sidebar.
Now choose the User Listing menu and label your list with a title. You can Add Items from the right sidebar if you want. I created a list named List of Affiliates based on the registered users’ Username.
Conclusion
WP User Frontend Pro features a lot more amazing modules. You can create unlimited profiles, WooCommerce products, custom post types, subscription models, and more.
Still unsure about how to manage affiliates on your WordPress site? I’m going to tell you the process in short –
Allow affiliates to register on your site through a registration form created with WPUF. The content restriction feature can limit access to a specific page based on user roles. Thus, you can control who can do what things on your website.
Create your desired forms, use the generated shortcodes and start managing your affiliates from the front!