How to Install WordPress on Localhost with AMPPS
There are lots of ways to install WordPress on localhost- I mean on your local machine.
You already know that building a WordPress site in local environment is not a serious business. It’s just a test-based web environment and you can build as many sites as you need in the same environment. I use an easy and free software package called AMPPS to build my local WordPress site.
AMPPS is similar to the packages like XAMPP, MAMP, and more in that. These include all of the things you need to run WordPress: PHP (the programming language), MySQL (the database), and Apache (the web server). That’s what some of the As, the Ps, and the Ms stand for here in the name of these services.
As I use a Mac, just note that AMPPS is also supported on Windows and Linux. Instructions are almost the same across the devices, so no need to get nervous.
In this post, we have shown how to install WordPress on localhost in a few steps.
- Download AMPPS
- Install & Run the AMPPS on Your Mac/PC
- Download WordPress.org Latest Version
- Create a Database
- Name your local website
- Complete installing WordPress on localhost
Let’s start with this basic question.
Why Install WordPress Locally?
A site in a localhost environment is basically for personal test purposes, not for outside users or audience. The only person who can see the site is you or someone using your device!
The question is- does someone really need to create a website on localhost?
Before going live with your site or to make a visual presence, you should learn the basics and test the final look or output of your blog, website, plugins/themes. A localhost site lets you check and experience the updates, changes, and settings etc. to be sure about your final outputs.
Local site is actually needed for everyone who are working or planning to start their journey with WordPress. You could be a developer, blogger, marketers, editors, tech business owners and more.
A localhost site helps you to prepare for your final move.
Now let’s shortly get introduced with the local server we are going to work with.
What is AMPPS- A Short Introduction
AMPPS is a software stack from ‘Softaculous’ enabling Apache, Mysql, MongoDB, PHP, Perl, Python and Softaculous auto-installer on your desktop.
AMPPS is Easy to Get and Use: AMPPS offers everything you need for a website development. Start developing your website from any open source web applications or just start writing code yourself.
You can perform Complex functions like backing up Database or Backing up your entire Website for that matter with just a click of a button. You can also Upgrade your Installations with a Click. Save the hassle while Importing your Scripts or Backing up your Website
AMPPS is Free like other Local Servers: Softaculous makes it as easy as it can get. The same workflow enables tasks to be completed rapidly and without navigating through multiple steps or pages
AMPPS vs XAMPP- Why Consider AMPPS rather than XAMPP/WAMP server?
XAMPP is a free and open-source cross-platform web server that is mainly used when locally developing web applications.
AMPPS by Softaculous is just more of it by any meaning. And not only that-
AMPPS Lets You Create a Website with WordPress, Joomla!, Magento and more
Just download and install AMPPS with Softaculous auto-installer to get started creating websites. You will be up and running in less than 5 minutes!
Once AMPPS is installed, do install the latest version of your favorite free web applications such as WordPress, Joomla!, Magento, and Dolphin using Softaculous. Yes, you can use AMPPS for any open-source platform.
How to install WordPress on localhost with AMPPS
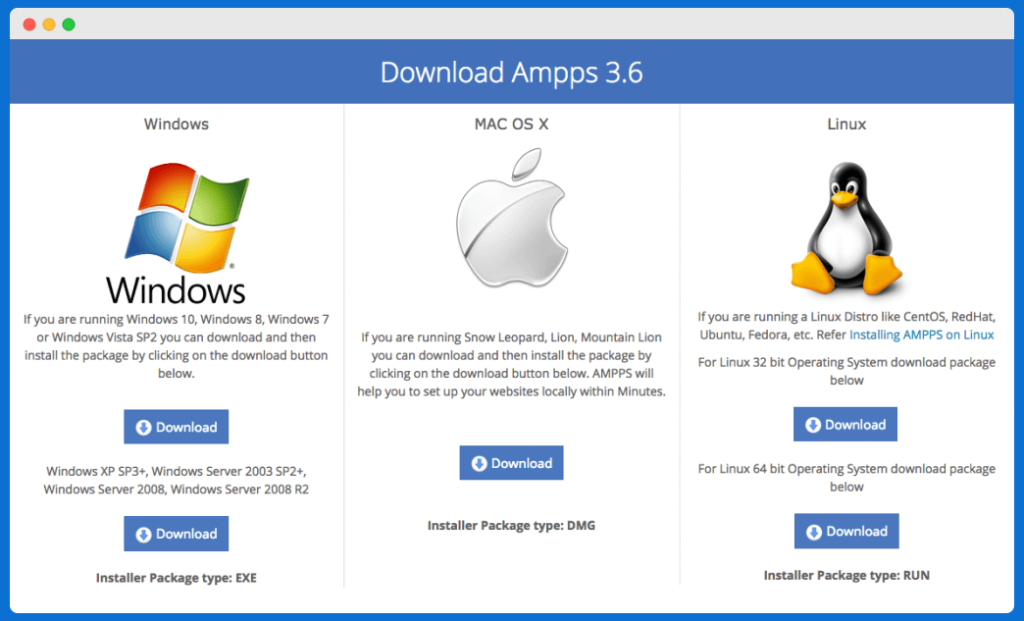
Step 1: Download and Install AMPPS
For our purposes, we’ll download the latest version of AMPPS.
Select the appropriate version depending on your operating system. If you’re a Linux user, you will need to select between the 32bit or 64bit packages. Don’t worry, instructions are given on the download page.
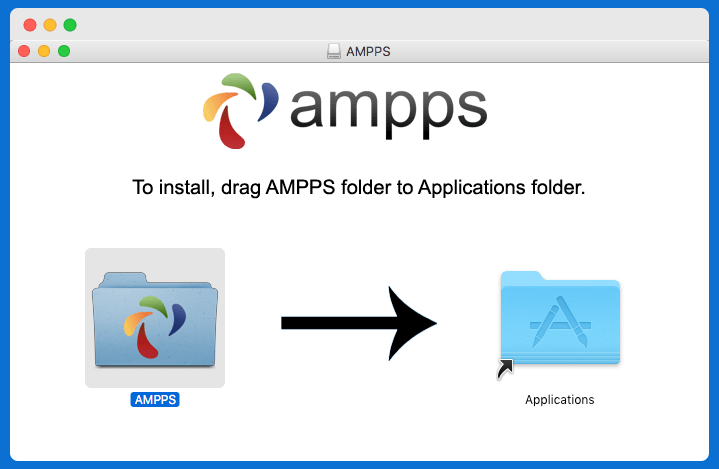
Just click and Install it like you would any other application. Since I’m using a Mac, after downloading, I will mount the DMG file and drag the app into my Applications directory.
Step 2: Turn on Apache and MySQL
After installing, open the AMPPS app. You will be greeted by the ‘Control Centre.’
Now turn on both Apache and MySQL by clicking the green buttons under each column.
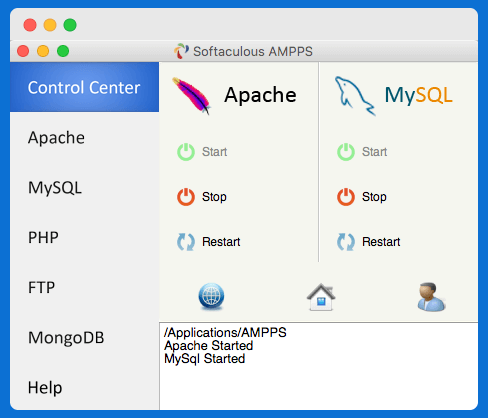
You’ll see success messages in the status window below. But to make double sure it’s working, type ‘http://localhost/‘ into your browser’s address bar.
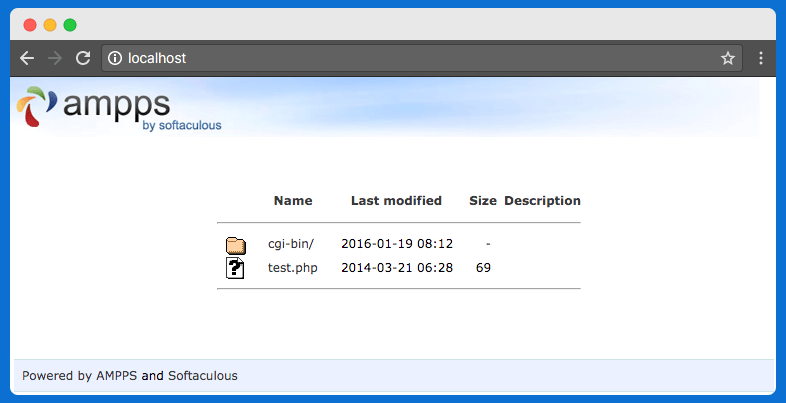
In some browsers, you may be able to get away with just typing ‘localhost‘. But since many browsers combine their address bar with a search engine, it might get confused and try to search for ‘localhost’ instead. So prefixing ‘localhost‘ with http:// is a good habit in our experience.
Congratulations! At this point, you have a functional web server running locally on your computer.
Fun fact: http://127.0.0.1 will also work like http://localhost/ and can be used interchangeably. This is known as the loopback IP address.
Step 3: Choose and Add a Domain Name
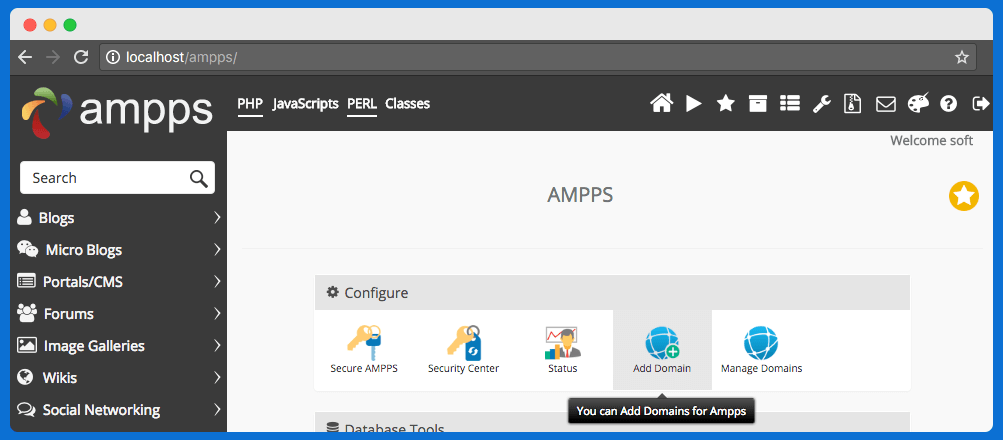
Now, click the house icon in the AMPPS Control Centre to access AMPPS home.
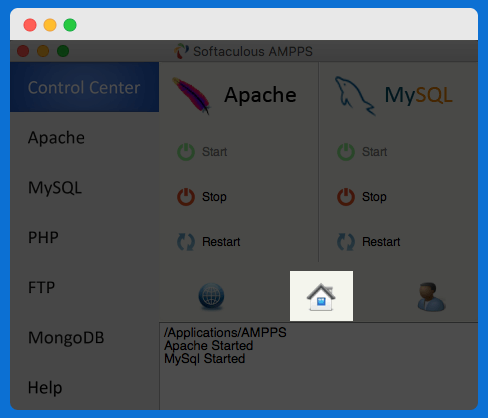
The Control Centre screenshot from above, with everything but the Home icon, greyed out.
You can also access AMPPS Home by typing the following URL into your browser’s address bar- ‘http://localhost/ampps‘
If you can not access it, refer back to step 2 and make sure Apache and MySQL are running.
Once you’re on the AMPPS home screen, click on the ‘Add Domain‘ link.
There are four reserved domain extensions for ‘testing and documentation examples’ according to this-
- .test
- .example
- .invalid
- .localhost
You should use one of the above to avoid conflicts with potentially available real domains (like .dev, which is a popular one for local development) .
For example, here we’ll use the following domain for today’s learning purpose: wordpress.localhost
On the ‘Add Domains‘ screen, we’ll type in our desired domain name.
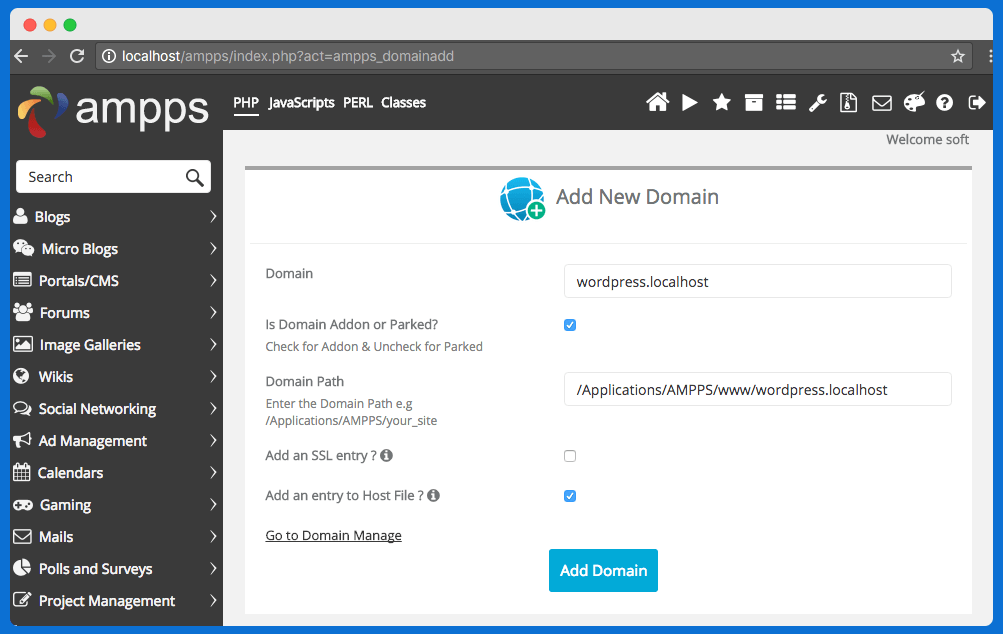
You’ll notice while you’re typing that the ‘Domain Path‘ field fills out to match. This is the folder where you will later add your WordPress files.
So, don’t forget to take note of this path. On your Mac, it will be the following-
/Applications/AMPPS/www/wordpress.localhost
Keep all the other settings on their defaults, just as seen in the screenshot-
- Is Domain Addon or Parked?… It should be Checked.
- Add an SSL entry?… It should be Unchecked.
- Add an entry to Host File?… It should be Checked.
Now, click Add Domain to add a domain.
At this point, typing ‘http://wordpress.localhost/‘ into the browser will lead to a page with an empty directory index.
Step 4: Download WordPress and Prepare for Installing
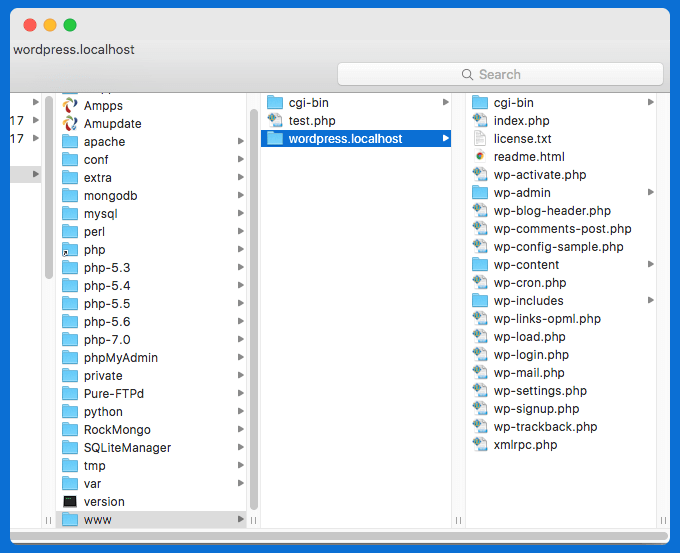
Download the latest WordPress core files from WordPress.org, and extract them in the directory path we chose above.
For your reminder, that path is- /Applications/AMPPS/www/wordpress.localhost
A quick way to find it on your Mac is to type your chosen domain into Spotlight search and select the first result. Here is how-

After extracting the WordPress files, your directory structure should look like this-
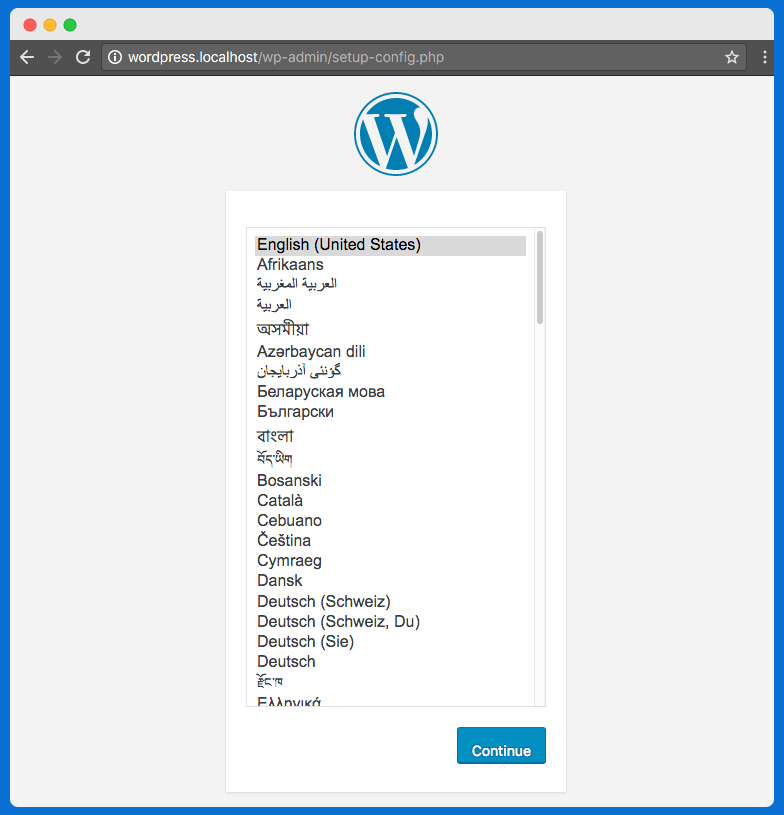
Also, after extracting the WordPress files, you will be greeted with the WordPress installation screen by typing your domain into the browser’s address bar.
Don’t worry, just continue.
But before you go through the WordPress installation process, you need to set up your database first.
Step 5: Set up Your Local Database in phpMyAdmin
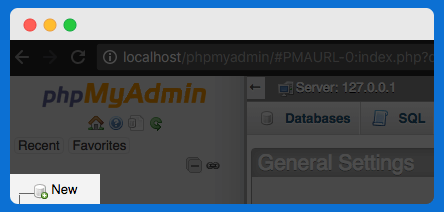
AMPPS includes phpMyAdmin like XAMPP which can be accessed at the URL-http://localhost/phpmyadmin
Just open a new tab on your browser and type in the URL above.
You need to use phpMyAdmin to create the MySQL database for running WordPress on it.
First, click the “New” link at the top of the left sidebar.
For example, I will use WordPress here. You can use whatever you want, just remember the name for the next step.
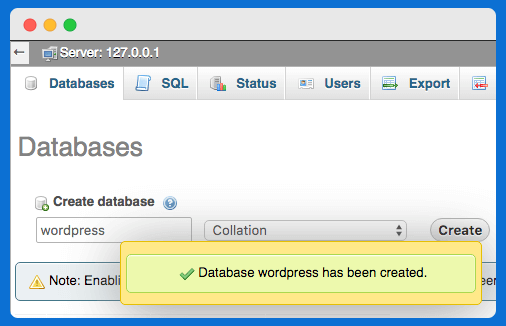
Once you’ve chosen your database name, type it in and click the ‘Create’ button.
You’ll see a success message soon after clicking on Create button.
Now close out of phpMyAdmin, and head back to your WordPress installation screen on the other tab at http://wordpress.localhost.
Step 6: Customise and Connect the Site to The Database
On the language selection screen(previously pictured), select the language you want and click the ‘Continue’ button.
Here we will select English (United States).
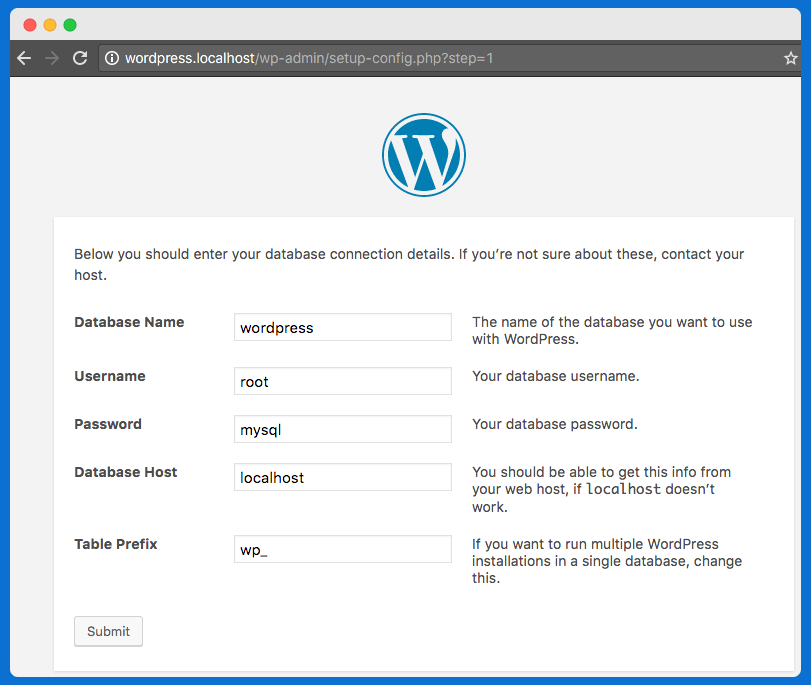
Now on your database credentials screen, input the following information-
Database Name: WordPress (or whatever you chose in Step 6)
- Username: root
- Password: MySQL
- Database Host: localhost
- Table Prefix: wp_
The root/MySQL username and password combination we use is a default in AMPPS, so there’s no need to add a separate database user.
The root user’s password can be changed.
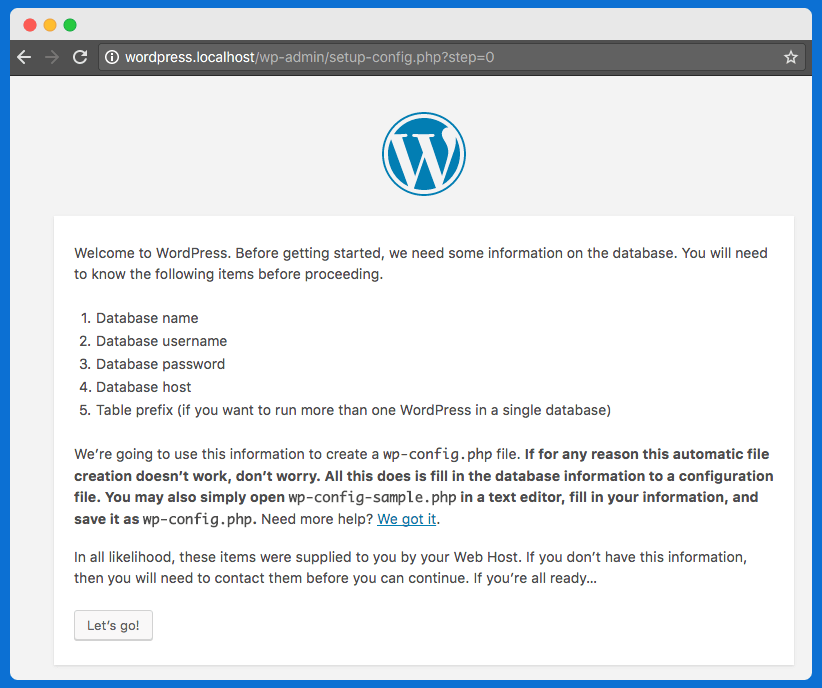
Click the ‘Let’s go!’ button on the next screen, as you already have all the database information you need.
In the background, WordPress will automatically create a wp-config.php file with the information WordPress needs to connect to your database.
After successfully connecting to the database, you will be prompted to finish this installation by specifying your WordPress site details.
Step 7: Finish Installing WordPress on AMPPS Local Environment
Fill out your site title, username, password, and email address on the next screen just like this-
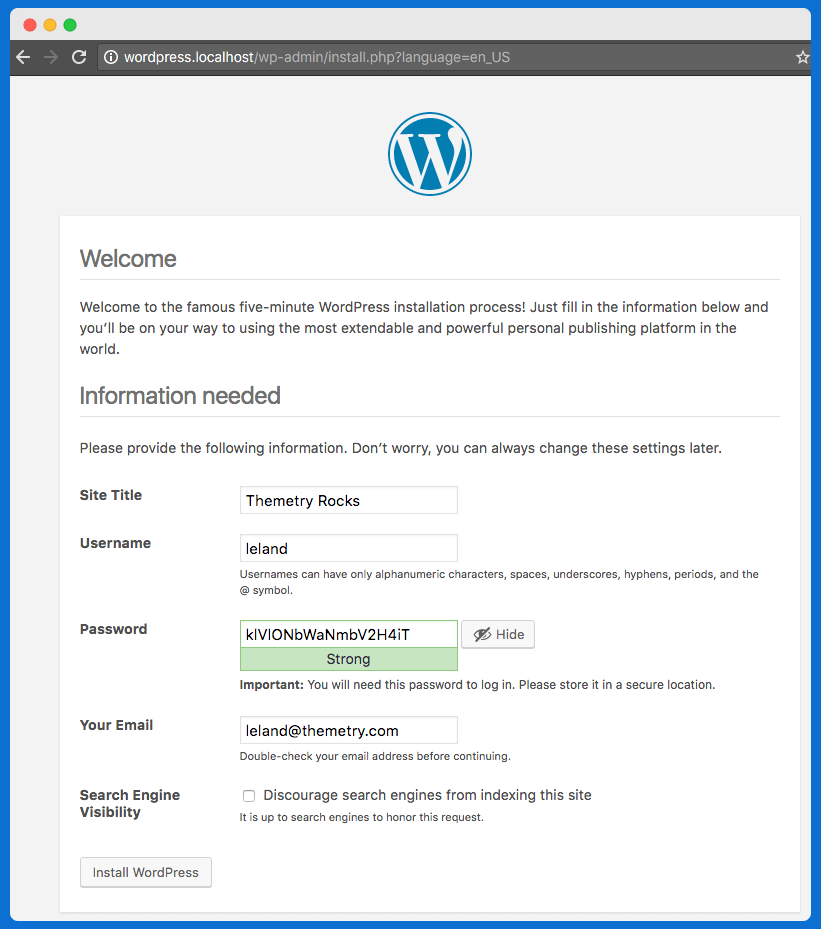
Note: Search engine visibility doesn’t matter because this WordPress website will not be accessible from the web, but feel free to further discourage search engines from indexing your site just for kicks.
After clicking the “Install WordPress” button, you’ll be redirected to the WordPress dashboard of your newly installed local WordPress site! Here is what your WordPress dashboard should look like-
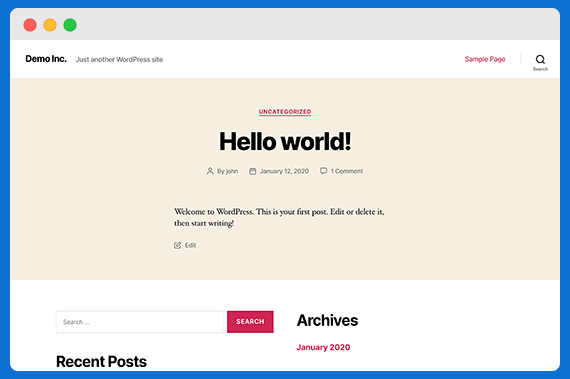
Congratulations! Your locally-installed WordPress site with AMPPS is now fully functional!
Closing on How to install WordPress on localhost with AMPPS
As we mentioned in the first sentence of this post, there are plenty of ways to install WordPress locally. We are not going to argue about which way is the ‘best’ and there are actually not enough reasons to choose one and avoid another.
AMPPS works fine, and we are comfortable with it. So we use it like too many others do. But the process is almost the same for the XAMPP.
So, you’re free to try XAMPP and other local servers based on your device. AMPPS and XAMPP are global and work with any device. Solutions like WAMP and MAMP are specific to particular devices. You can go for any of them.
Having any trouble installing WordPress with AMPPS or XAMPP? Do let us know in the comment section.