How to Set up WooCommerce Multivendor Marketplace Using Dokan on WordPress
You have decided which WooCommerce multivendor plugin to choose for your dream marketplace. Now a question appears on your mind- how to set up your multivendor marketplace on WordPress. Let us help you out.
No doubt that Dokan is the best multivendor plugin for WooCommerce with 70k+ active running marketplace out there. Dokan has been in the market before the other multi-vendor plugins. It is one of the most efficient multivendor plugins. Installing Dokan is pretty simple.
Before you install Dokan, your site should be running on WordPress and you should install and activate the WooCommerce plugin as well.
Once WordPress is installed and running on your system. You can then install and activate the multivendor marketplace.
Step One: Install and Activate the Dokan Plugin
The first step is to install and activate the Dokan plugin. This can be done by logging in to the WordPress dashboard,
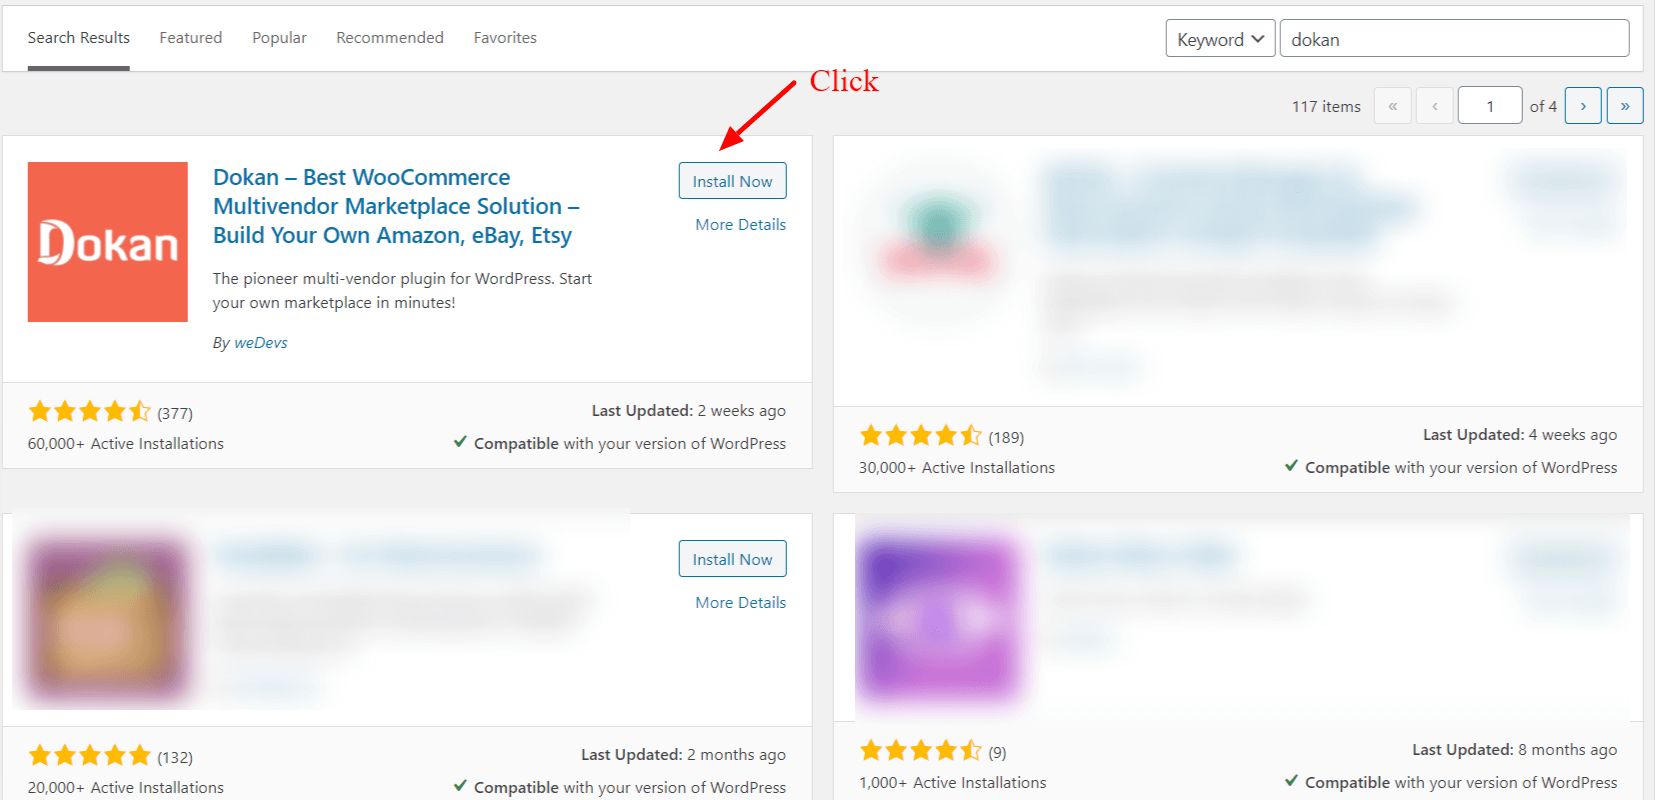
Click Plugins >>Add New.
This will direct you to the plugins page. Click on the search box. Enter Dokan and hit search. Select Dokan, and click install, and once it installs, you can activate the plugin.
Once you have successfully installed and activated the plugin. It will prompt the installation wizard. The Installation wizard is the popup that comes up after activating the plugin. It will guide you through the step-by-step procedure for setting up Dokan.
Step Two: How to Customize Dokan Plugin Setting Wizard
The Installation wizard is divided into 5 stages:
- Store
- Selling
- Withdraw
- Recommended
- and Ready
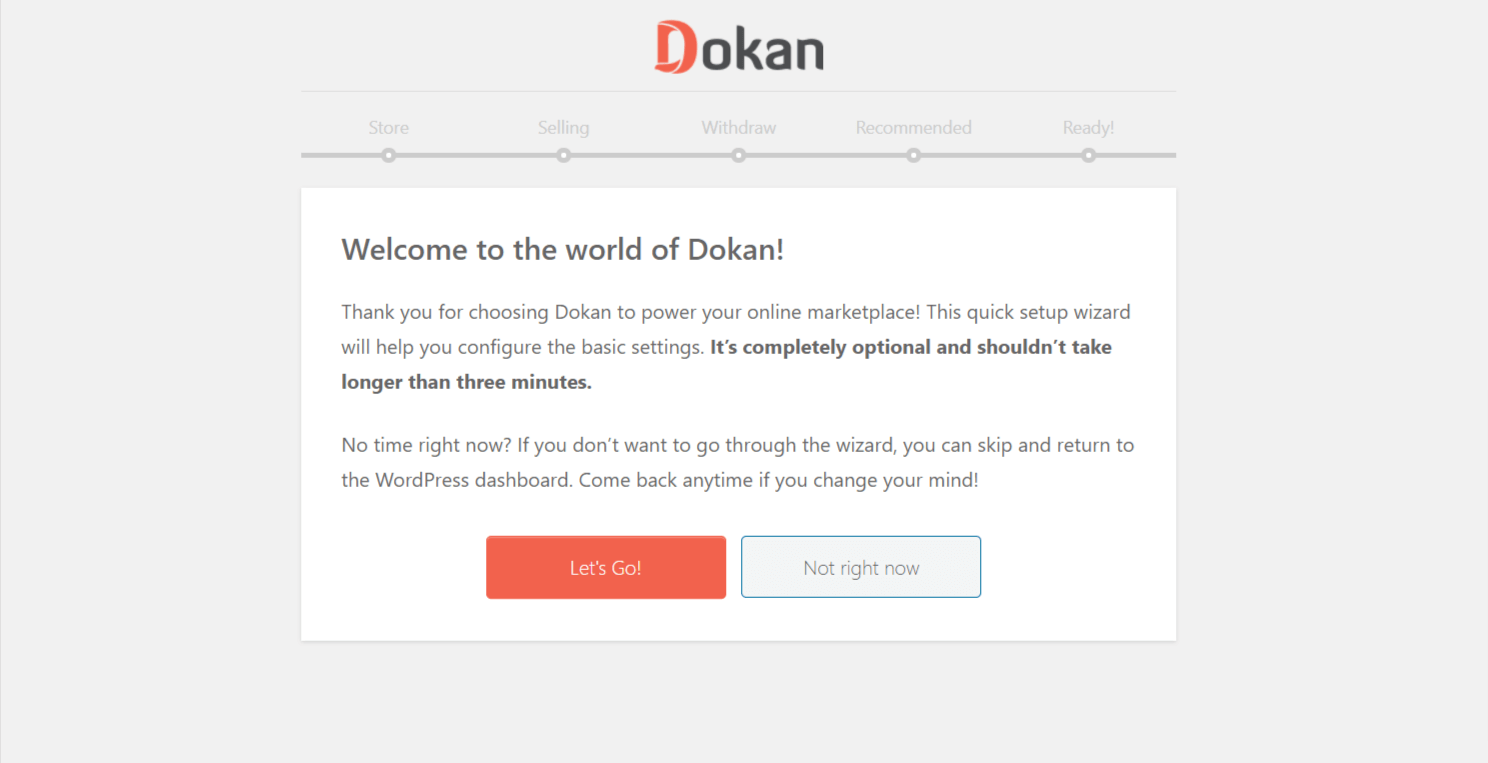
Once it prompts the installation wizard click let’s go
1. Store Set up
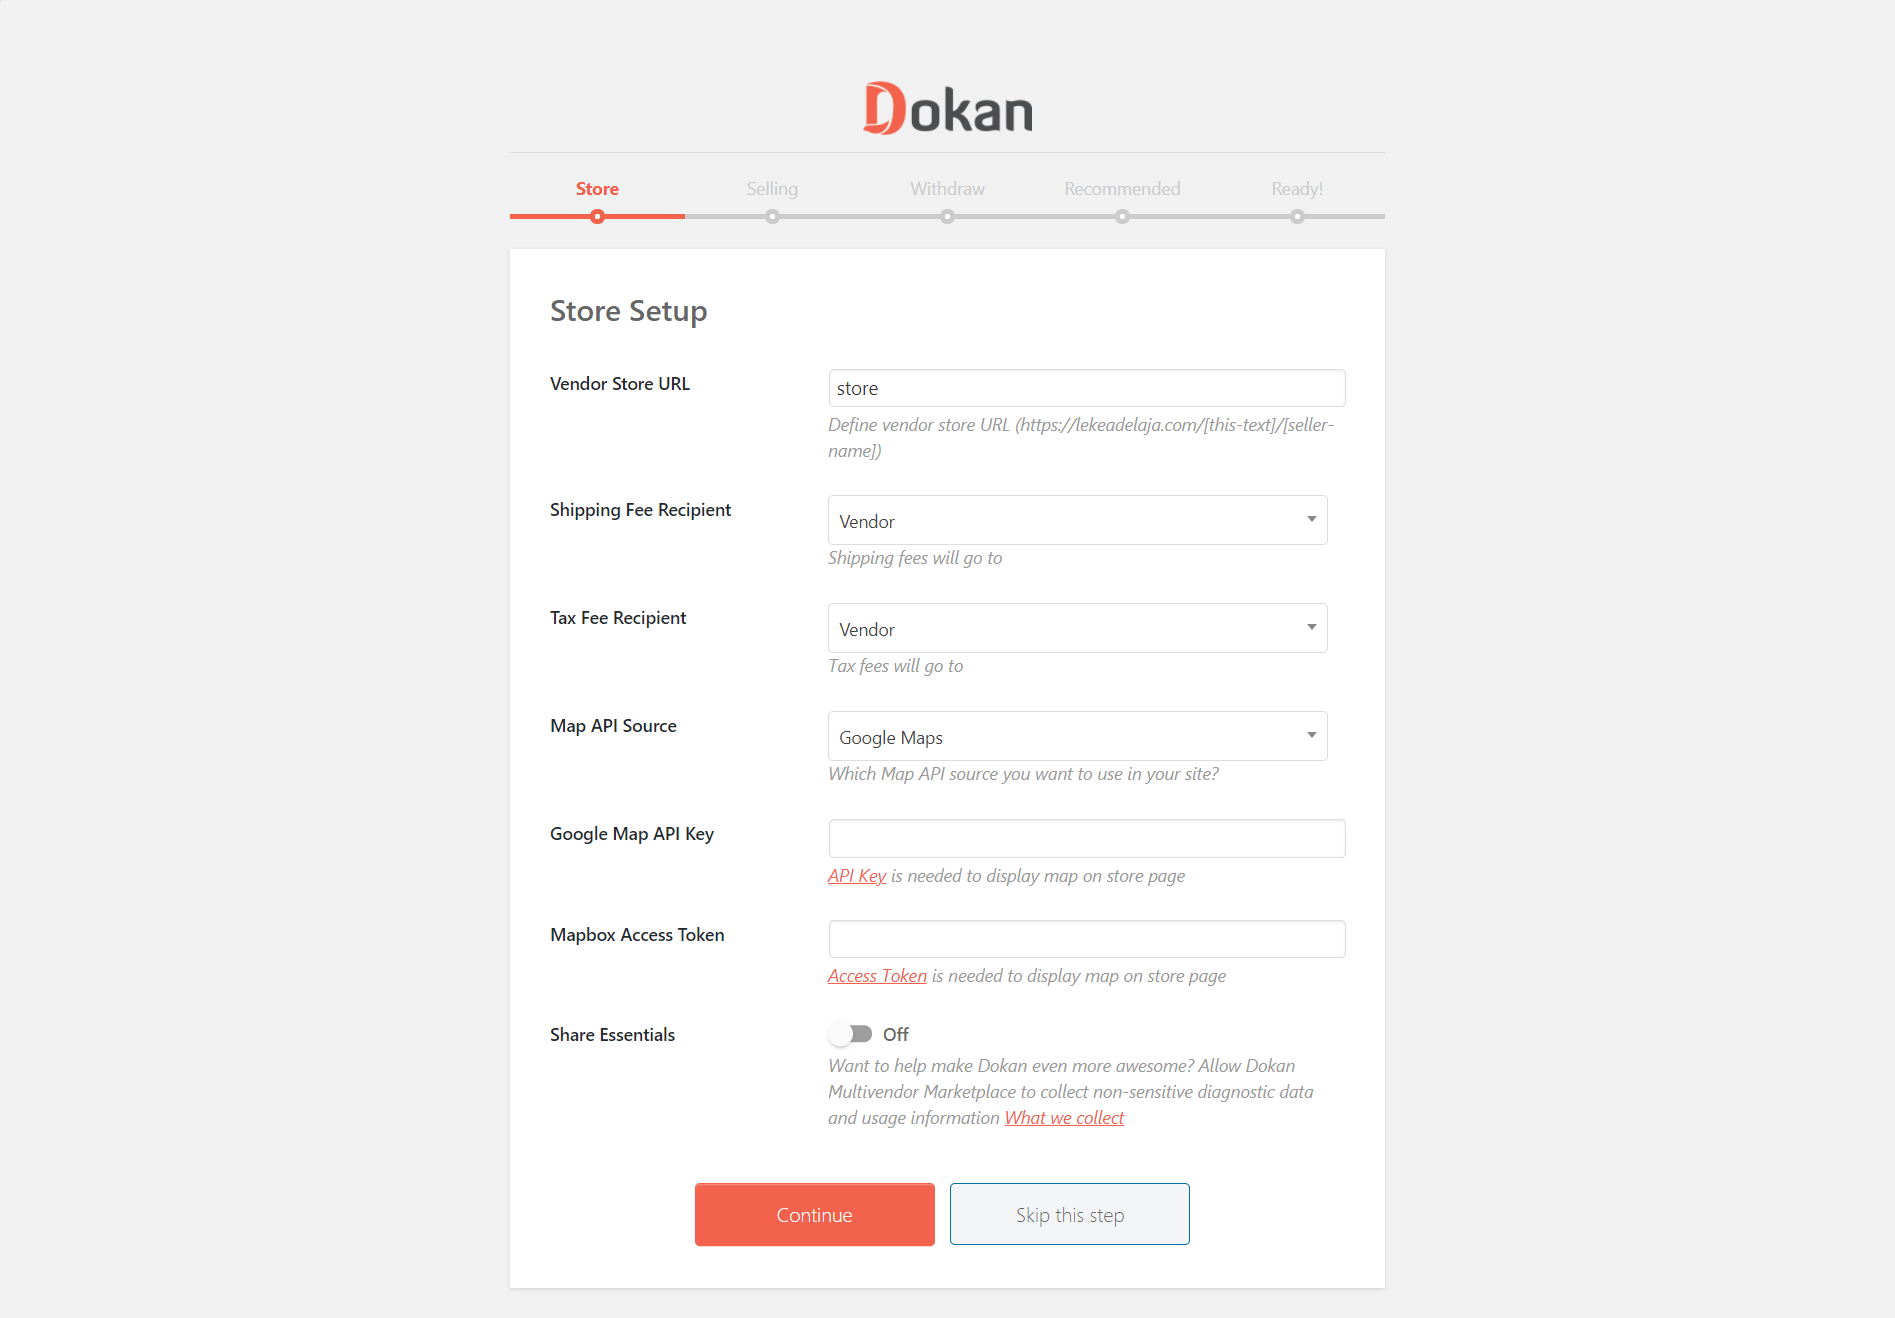
Under Store, you can set up some important elements of the store.
Vendor Store URL: You can set up the URL store of vendors, this is the vendors can use to access their store.
Shipping Fee Recipient: This feature allows you to set the recipient that will receive the shipping fee, You can select either the vendor or the Admin.
Tax Fee Recipient: You can also decide who receives the tax, the vendor, or the Admin, this depends on who will be responsible for collecting and remitting the tax.
Map API Source: This lets you select the type of Google API you would like to use on your site. It could either be Google Maps or Mapbox.
Google Map API Key: This is required if you select the Google Map option. You first need to generate an API key for Google Maps to be displayed on your site.
Mapbox Access Token: Depending on the option that you select, if your map API source is Mapbox, kindly enter the API key here.
Share Essentials: This is by default turned off If you want to allow Dokan Multivendor Marketplace to collect nonsensitive diagnostic data. This is to help Dokan improve the quality of the plugin.
2. Selling/Commission Set up

New Vendor Enable Selling: This option automatically enables selling for new vendors.
Commission Type: The commission type can either be a flat rate or a percentage. If it is a flat rate, you can select a flat rate to charge on every sale and a percentage could mean you can receive a percentage off all sales.
Admin Commission: This will determine the percentage or rate of the admin charges for all sales. If you selected a flat rate, you can enter the figure here. However, if you selected a percentage, you can enter the percentage here.
Order status change: This option allows vendors to change order status.
3. Withdrawal Setup
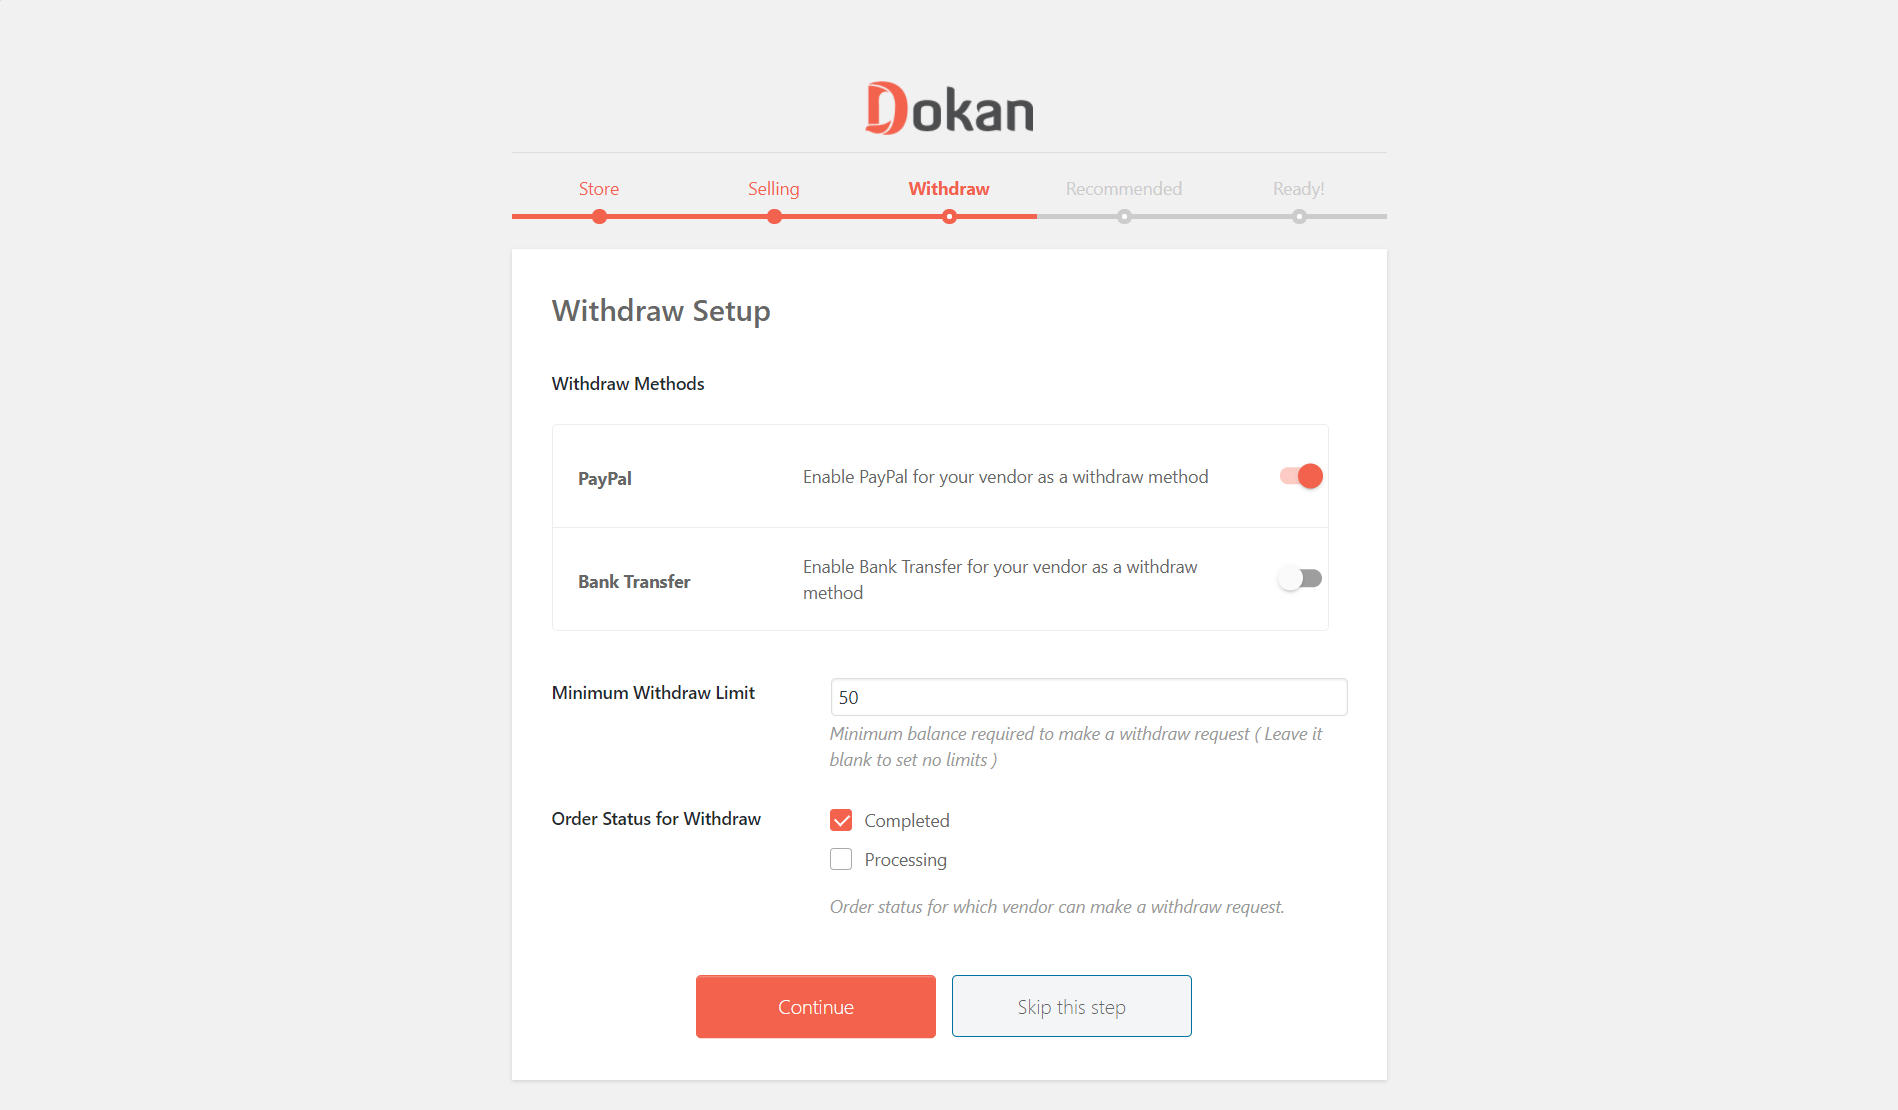
This aspect deals with activities that revolve around payment and withdrawal.
PayPal: It allows you to activate the PayPal payment option.
Bank Transfer: It lets you activate direct bank transfers.
Minimum Withdrawal Limit: you can set up a minimum Withdrawal limit. This is the minimum amount a vendor is allowed to withdraw.
Order Status for Withdraw: This will determine when a vendor is due for payment. You can either set up a withdrawal when the order is completed or in processing.
4. Recommended for all Dokan Marketplaces
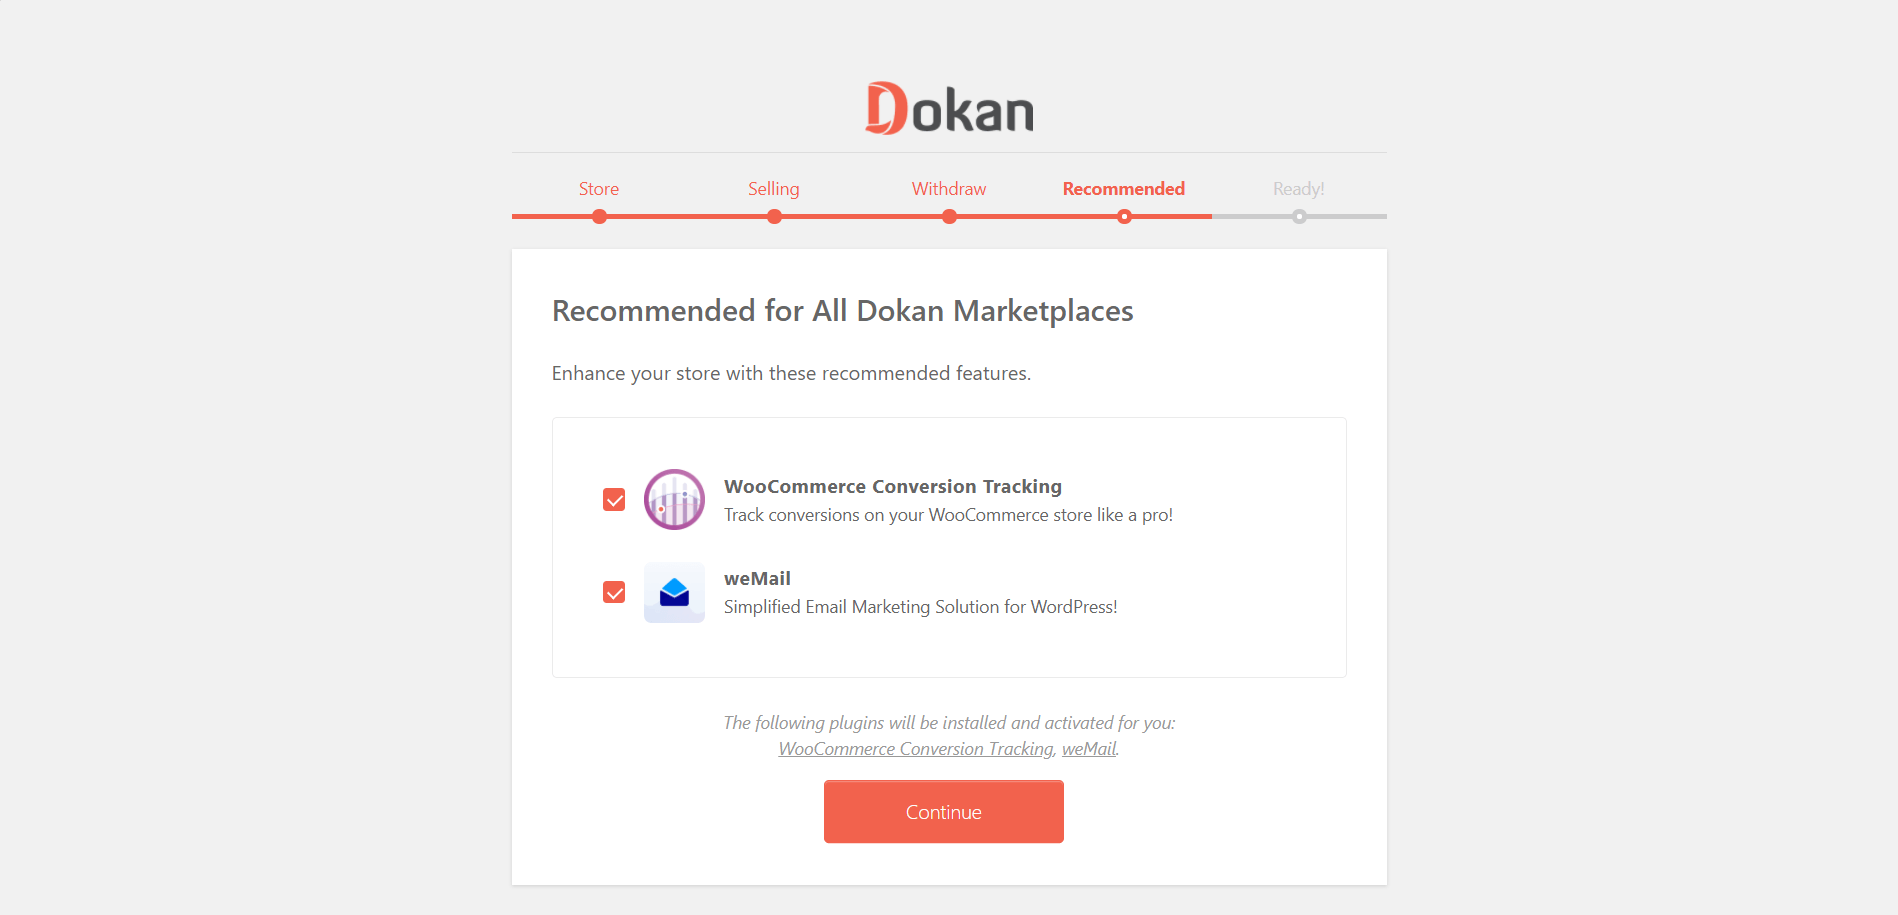
These options are other recommended plugins that you can add to your Dokan Installation. Ensure to check the plugins before you proceed.
a. WooCommervce Conversion Tracking: This plugin helps you to track conversion on your WooCommerce multi-vendor online marketplace.
b. weMail: This is a comprehensive email marketing solution. it allows you to capture and send emails.
5. Ready
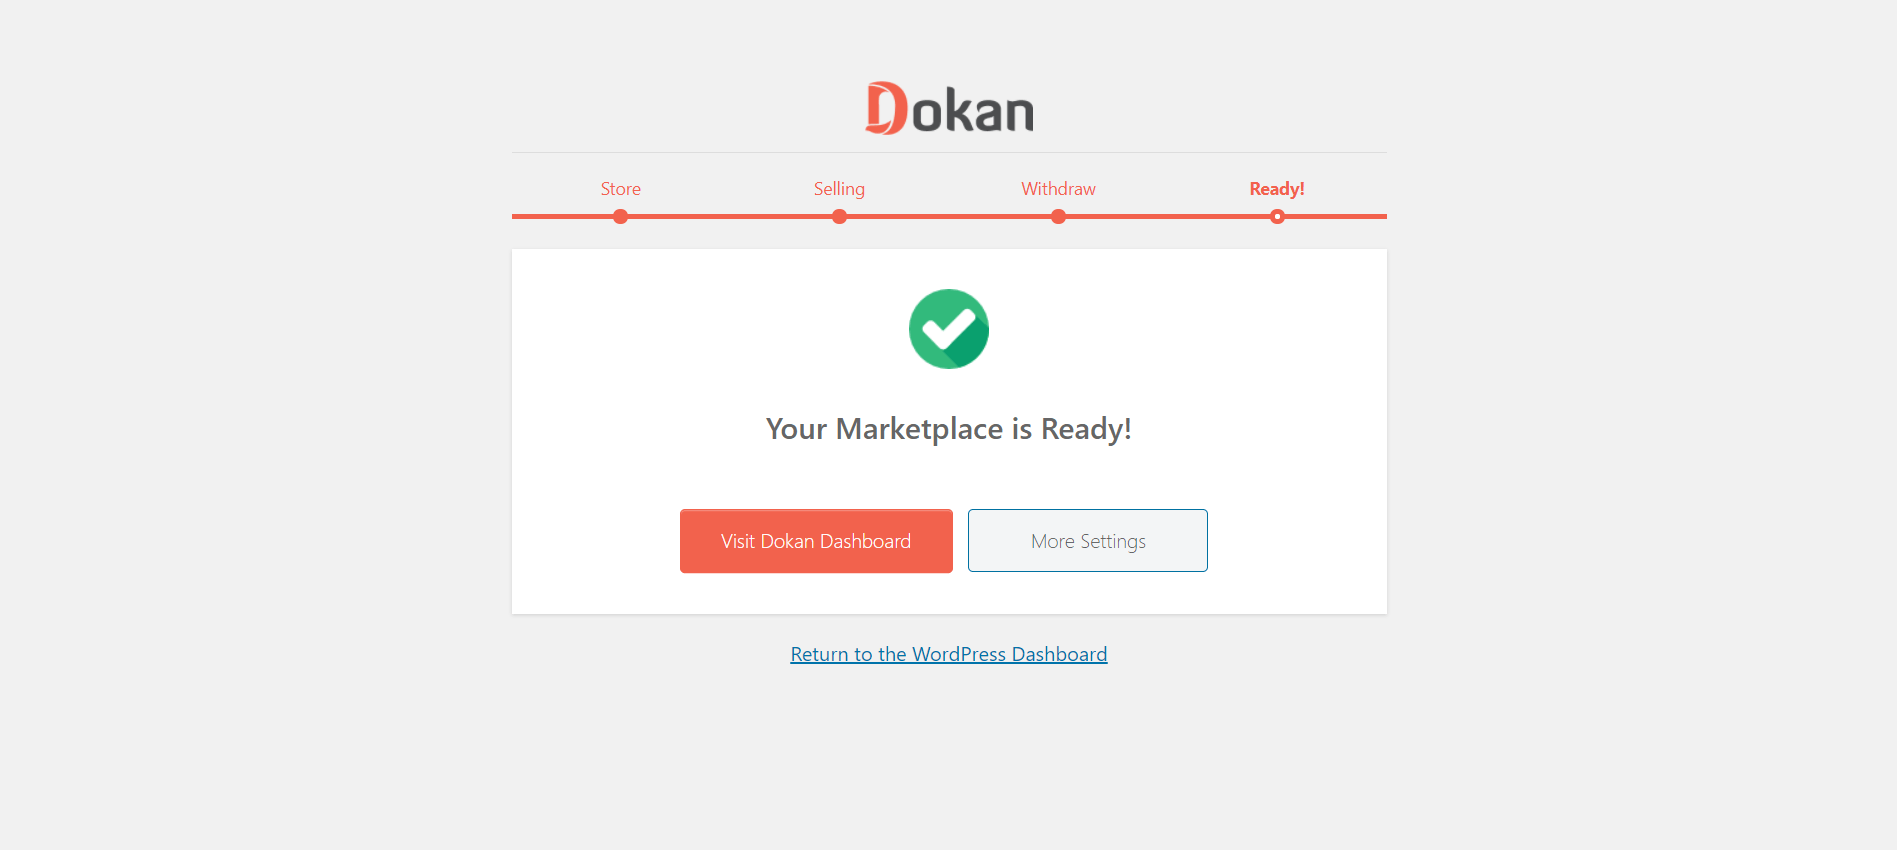
Congratulations, Your Installation is ready and Dokan is now fully activated on your site.
You can either click the Visit Dokan Dashboard or More Settings depending on the action you want to carry out.
Step Three: Customize Your Multivendor Marketplace Settings
1. General Settings of Dokan
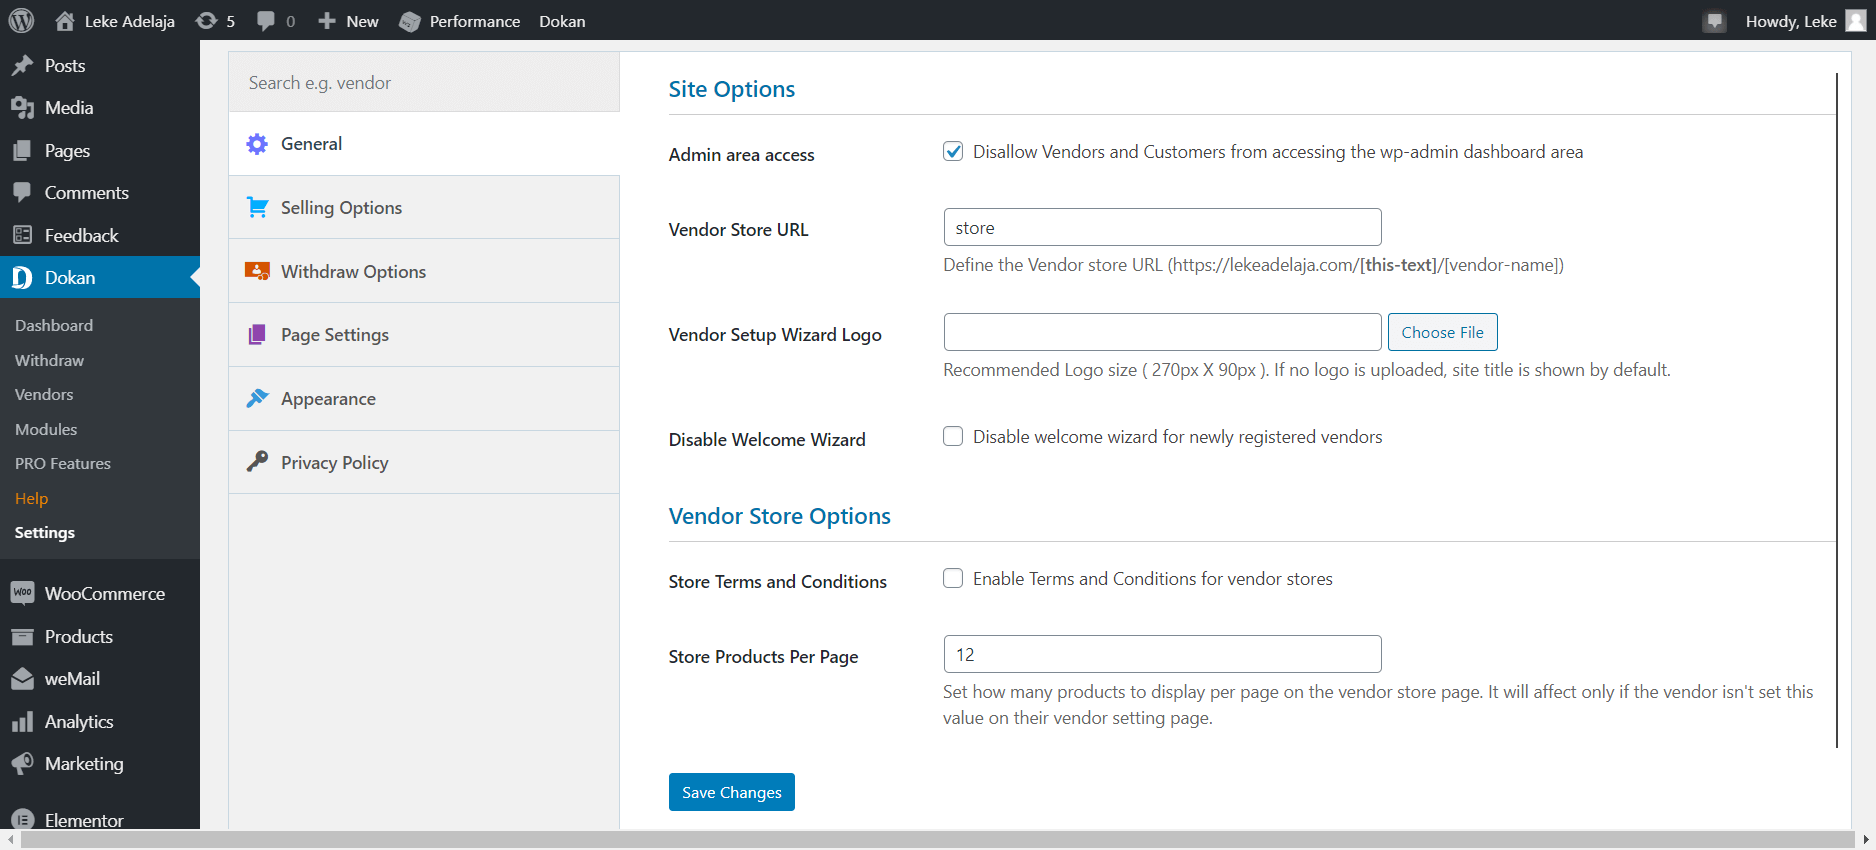
This allows you to set up admin Access, Vendor Store URL, Vendor Set up wizard logo, Disable Welcome Wizard, Store terms and conditions, and store products per page.
2. Selling Options with Dokan
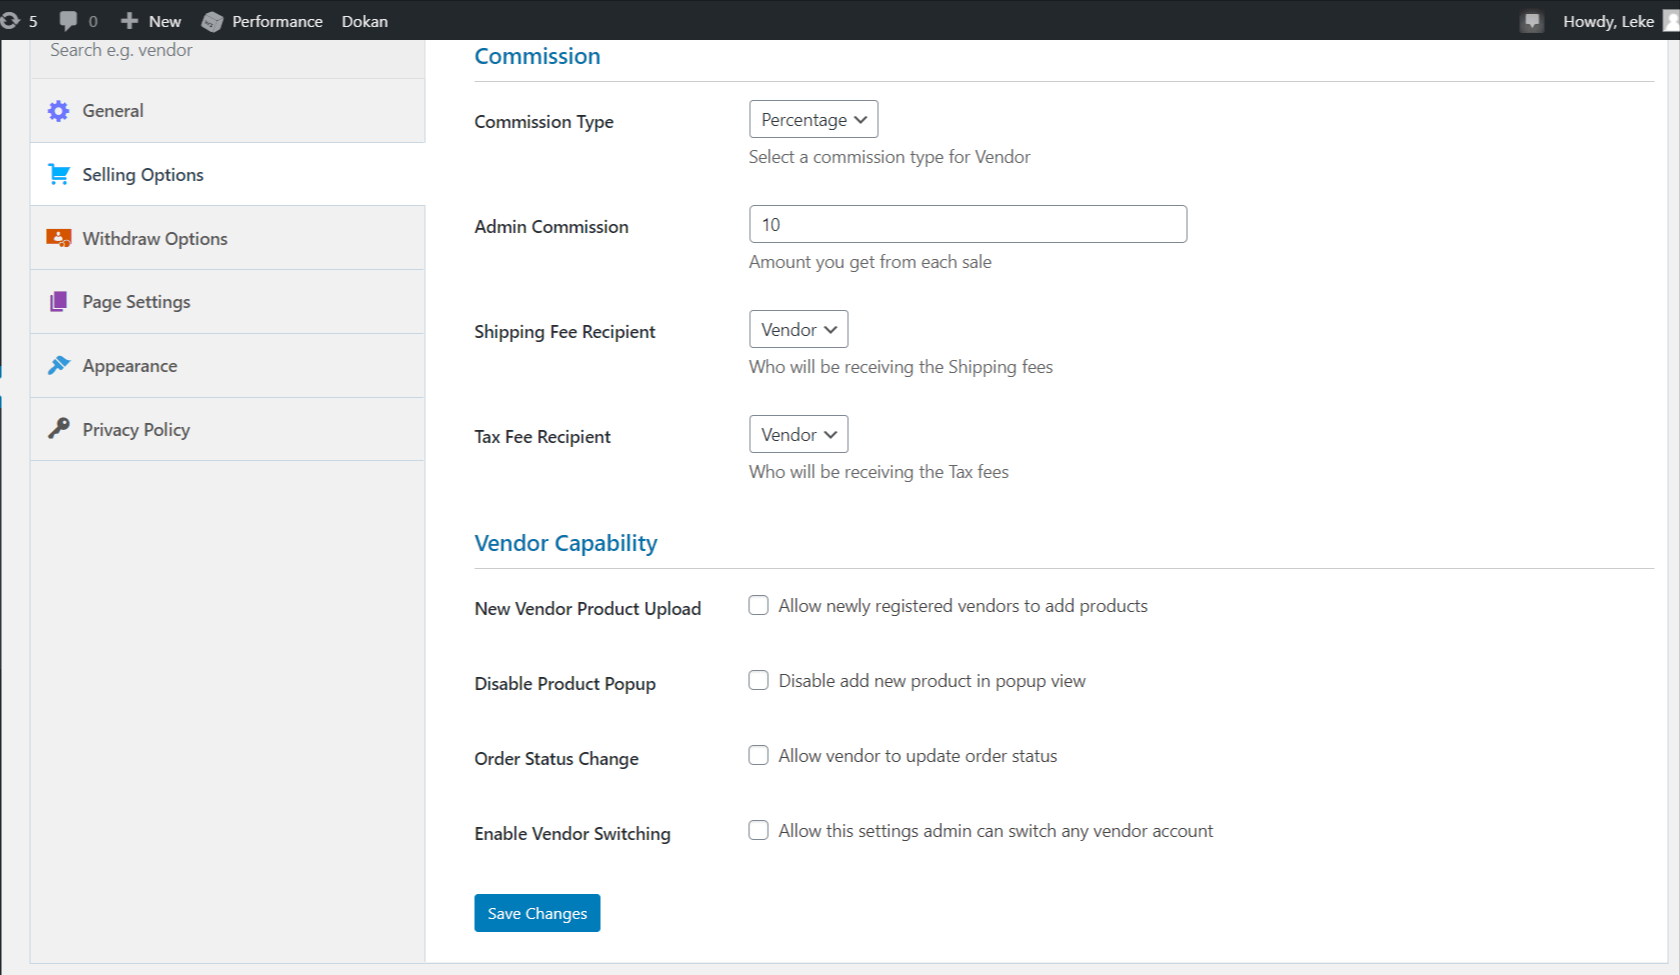
You can set up Commission Type, Admin Commission, Shipping fee Recipient, tax fee recipient, New vendor product upload, disable product popup, order status change, and enable vendor switching.
3. Withdraw Options with Dokan
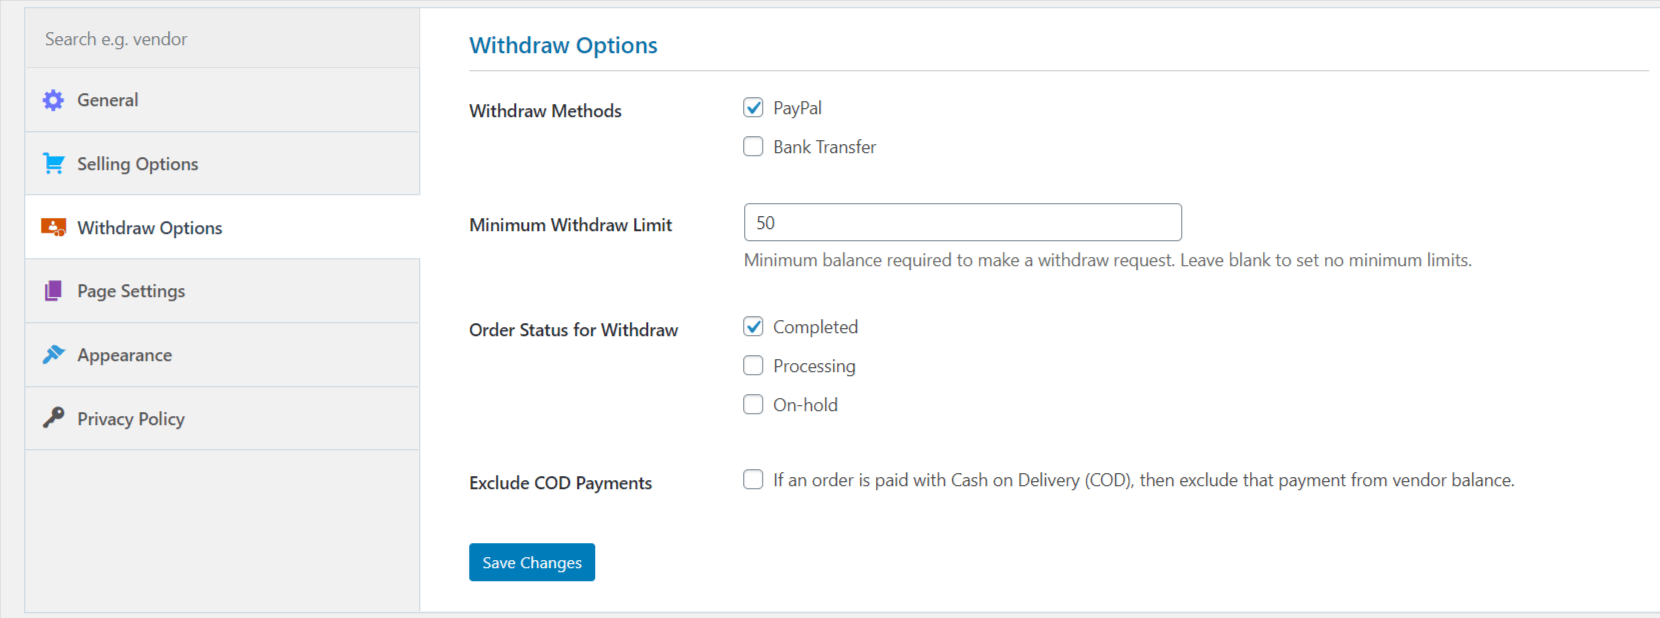
It lets you set Withdraw methods, minimum withdrawal limit, order status for withdrawal and the option to exclude payment on delivery.
4. Page Settings with Dokan
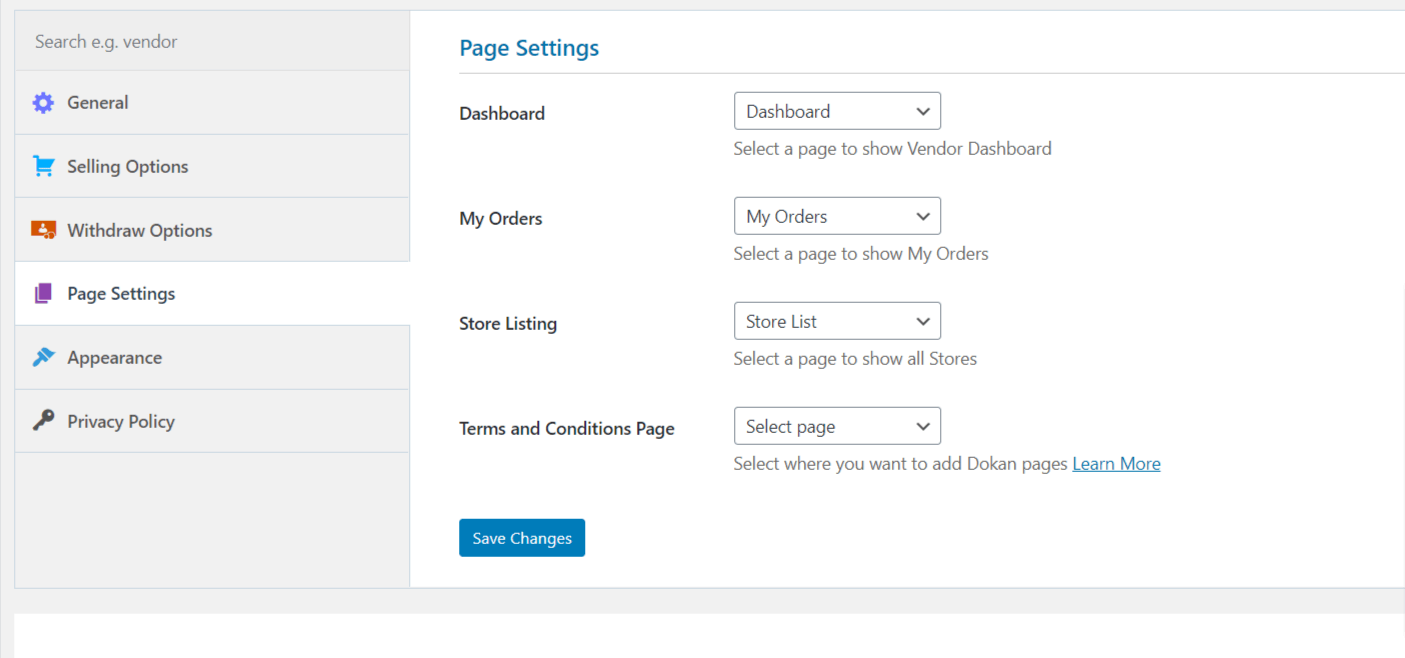
You can select the dashboard page, My orders page, Store listing page, or terms, and conditions page.
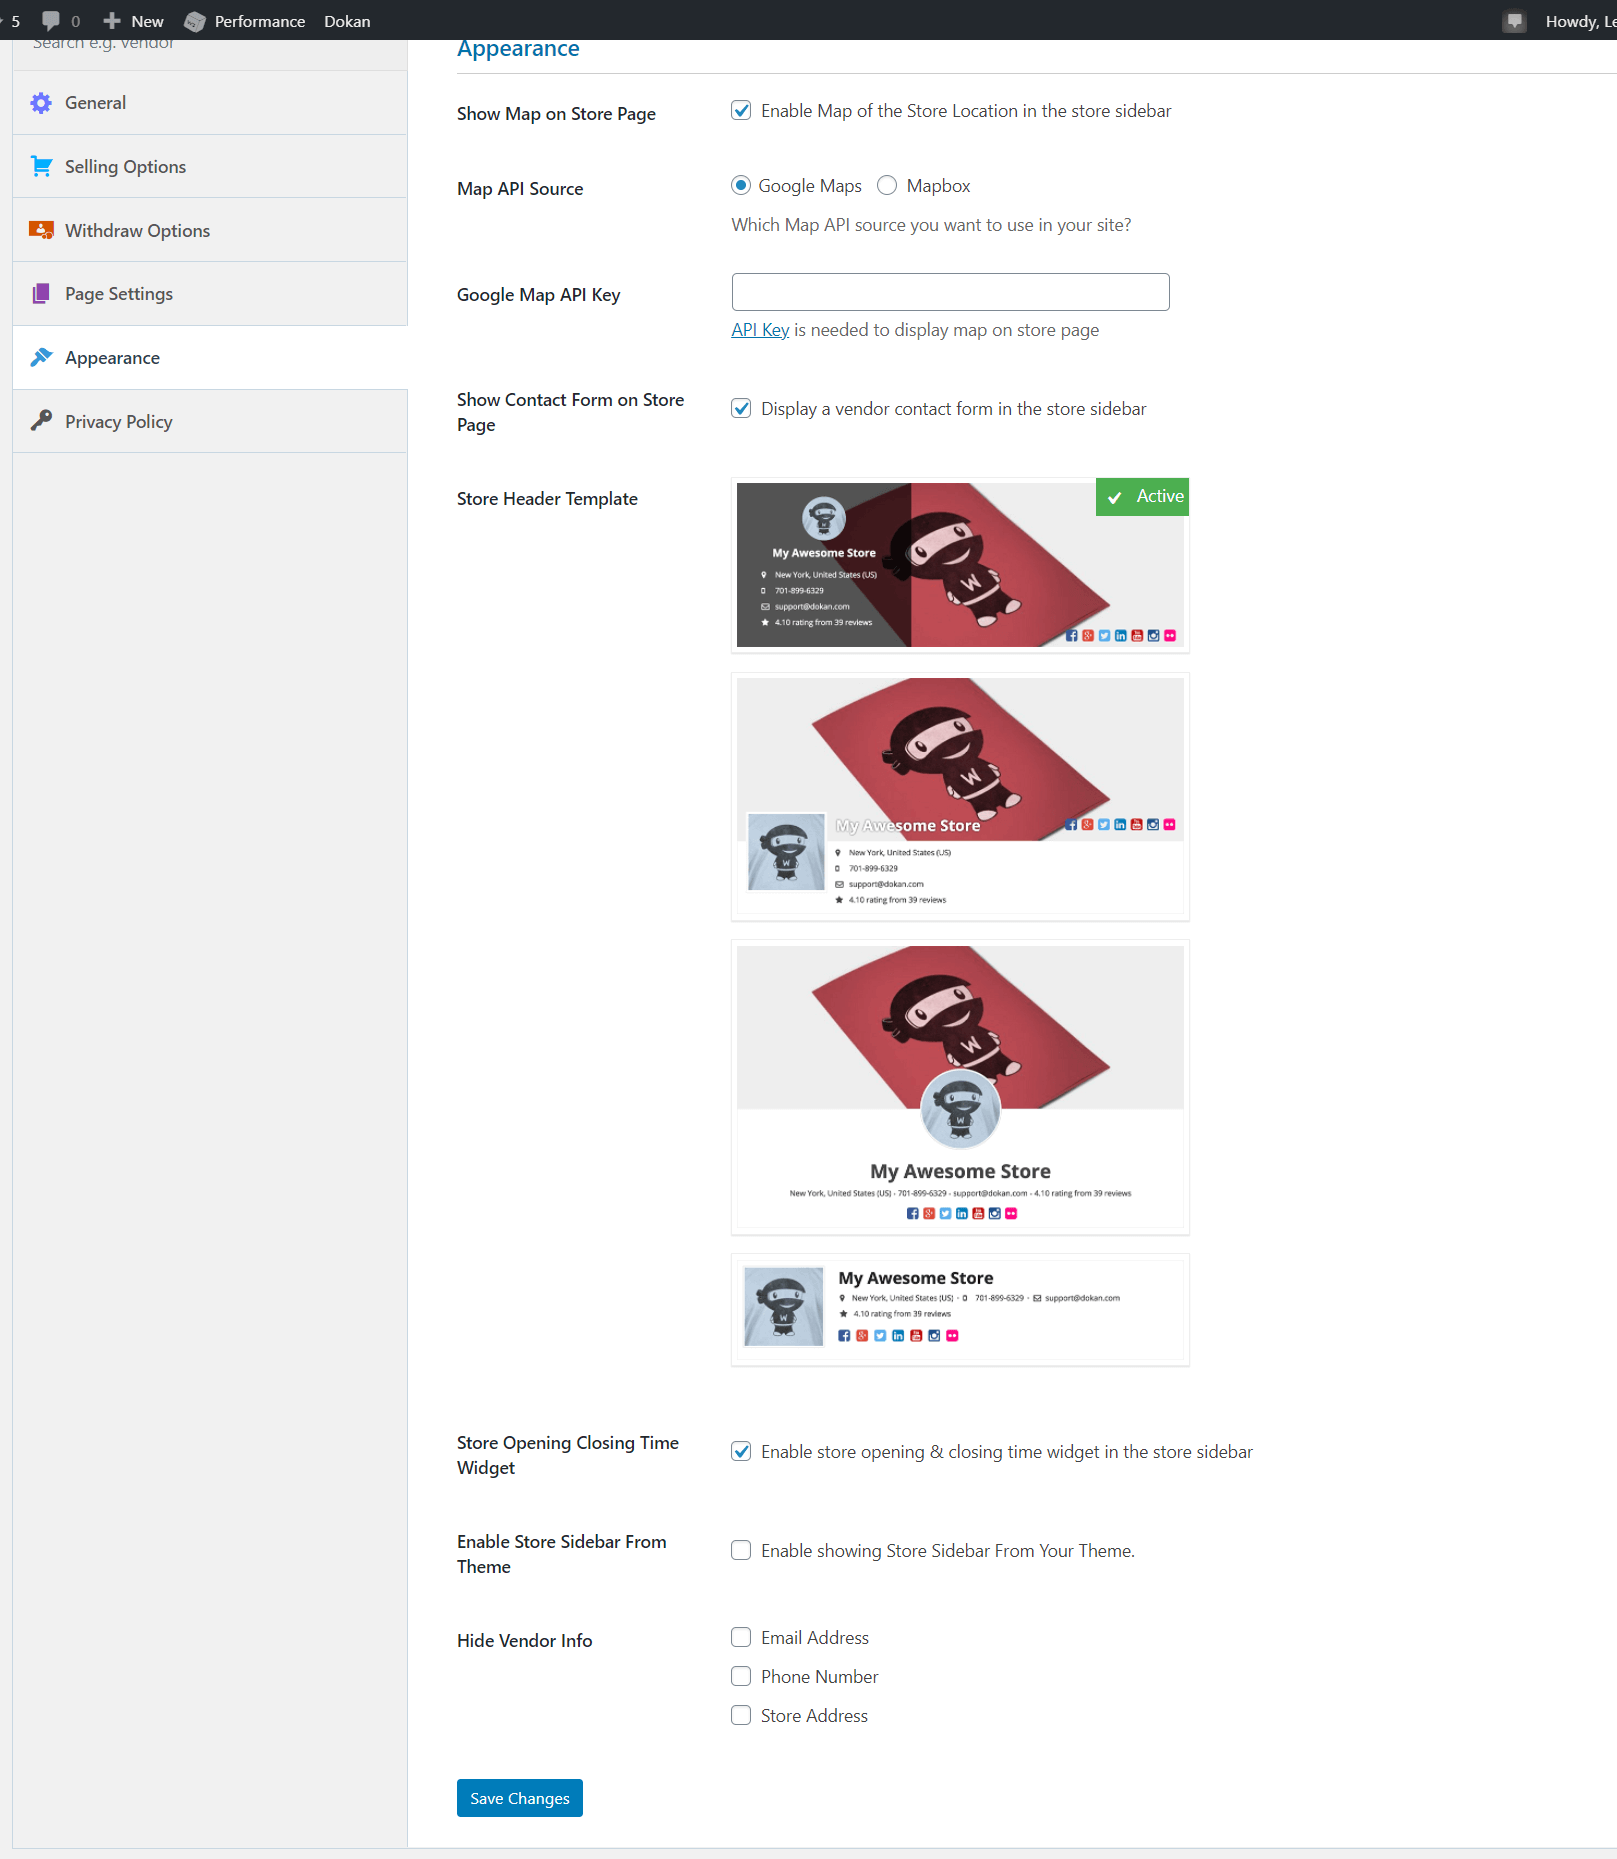
5. Appearance
You can set up functionalities like showing Map pon page, map API source, showing contact form on Store, Store header template, and Show opening and closing time widget. Enable the store sidebar from the theme and hide vendor information.
6. Privacy Policy
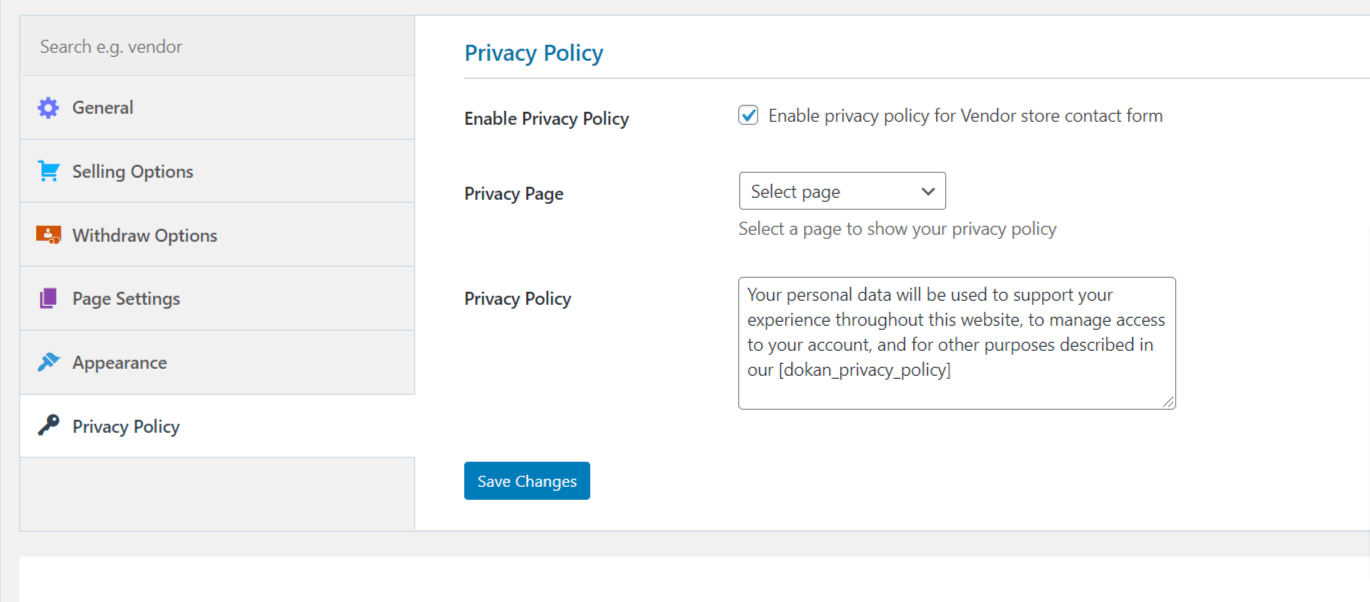
You can easily enable the privacy policy, set up the privacy page, etc.
Are you done?
Congratulations! This is how to set up a WooCommerce multivendor plugin with Dokan on WordPress. Now choose an attractive eCommerce theme and start uploading products on your own. Also, start inviting vendors to sell on your marketplace to ensure your desired income.
Don’t forget to let us know if there’s something we can do for you or anything that you want to share with us and other audiences.